18 KiB
Admin's Guide to TaleWeave AI
Contents
- Admin's Guide to TaleWeave AI
Hardware
Disk space
The amount of disk space required depends primarily on the LLM and Stable Diffusion checkpoints being used.
The game world is usually < 1MB and up to 2 copies of each world are kept on disk. The images rendered for various objects and events in the game can grow over time, but each image should be about 1MB, depending on the image size that you choose.
Approximate disk space requirements:
| LLM / SD | SD v1.5 (3-4GB) | SDXL (6-8GB) |
|---|---|---|
| 7-8b (4-6GB) | 8-10GB | 10-12GB |
| 14b (8-10GB) | 15GB | 20GB |
| 30b (16-20GB) | 25GB | 30GB |
| 70b (30-40GB) | 35GB | 50GB |
The exact size will vary by model, checkpoint, quantization, etc, and is likely to grow over time.
GPU and VRAM
Technically, you do not need a GPU to run TaleWeave AI. However, performance will be much better with at least one GPU. Running the LLM on CPU is not recommended and will impact the game's performance, but it is possible.
If you want to render images of the world while the characters are acting, you will need two GPUs or you will need to run image generation on the CPU.
The required amount of VRAM depends on which models you choose and their memory requirements, which is related to parameter size and quantization.
Recommended VRAM:
| LLM / SD | SD v1.5 | SDXL |
|---|---|---|
| 7-8b | 1x 16GB | 1x 24GB or 8GB + 16GB |
| 14b | 1x 24GB or 8GB + 16GB | 2x 16-24GB |
| 30b | 1x 48GB or 8GB + 32GB | 1x 48GB or 16GB + 32GB |
| 70b* | 8GB + 48GB | 16GB + 48GB |
Notes:
- 70b models need to be quantized to 4-bit or so to run on a 48GB GPU
- While it may be possible to run both text and image generation on the same GPU, two GPUs are recommended
Networking and ports
If you want to make the websocket server accessible over the internet, you will need at least one open port.
If you are using a load balancer, make sure it is compatible with websockets.
If you are running Ollama and ComfyUI on separate pods or servers, they will each need one open port. Any load balancers in front of the ComfyUI server must be compatible with websockets.
Setup
Clone the git repository
Clone the TaleWeave AI repository:
git clone https://github.com/ssube/taleweave-ai.git

cd taleweave-ai
This will clone the main branch, which is currently the development branch and may not be totally stable.
Set up a virtual environment
Set up a virtual environment to manage the dependencies:
# Create a virtual environment
python3 -m venv venv

# Activate the virtual environment
source venv/bin/activate
If you prefer using Conda or other tools, you can create an environment using their commands instead. Make sure they are compatible with pip packages.
Install the pip dependencies
Install the pip dependencies into your virtual environment:
# Install dependencies
pip install -r requirements/base.txt
Launch Ollama for text generation
Since TaleWeave AI is a text adventure, some kind of text generator is required. By default, TaleWeave AI is designed to work with locally-hosted LLM servers, like Ollama.
Ollama releases binaries for Linux, Mac, and Windows, along with a Docker container that works on RunPod and other GPU container services.
Launch an Ollama server and pull the model that you plan on using:
# Start the server
ollama serve

# From a different terminal or tab, pull the model
ollama pull dolphin-llama3:70b
If you are using Ollama, you will need to set the following variables in your server environment:
PACKIT_DRIVER=ollama
OLLAMA_API=http://127.0.0.1:11434
If you are running Ollama with a GPU, you should also set the number of GPU layers and context length:
OLLAMA_NUM_GPU=100
OLLAMA_NUM_CTX=8192
These environment variables need to be set in the terminal where TaleWeave AI will be running, they are not used by the Ollama server.
If you receive errors from Ollama and the logs indicate that it has run out of CUDA memory, decrease the number of
layers that are moved to the GPU by decreasing the value of the OLLAMA_NUM_GPU variable.
Please see the Ollama docs for more details:
Using OpenAI
If you are using the OpenAI API, you will need to set the following variables in your server environment:
PACKIT_DRIVER=openai
OPENAI_API_KEY=YOUR_API_KEY
Please see the OpenAI docs for more details:
Using vLLM
You can use vLLM for text generation instead of Ollama. This has not been thoroughly tested, but anything server that is compatible with the OpenAI API should work, and vLLM seems to work in general. Some models are available for vLLM on the HuggingFace Hub that are not available for Ollama, and performance differs on different hardware. Use the server that works for you.
python -m vllm.entrypoints.openai.api_server \
    --model cognitivecomputations/dolphin-2.9-llama3-70b
If you are using vLLM, you will need to set the following variables in your server environment:
PACKIT_DRIVER=openai
OPENAI_API_BASE=http://127.0.0.1:8000/v1
OPENAI_API_KEY=empty
Please see the vLLM docs for more details:
Recommended: Launch ComfyUI for image generation
You can use ComfyUI to generate images of the characters, places, and events happening in the game.
In your ComfyUI folder, launch the server:
python main.py
Please see the ComfyUI docs for more details:
Register
Register a Discord bot
If you want to play the game through the Discord bot, you need to register a bot and invite it to the server(s) where you want to play.
These bots can connect to multiple Discord servers and channels, but the bot token should be kept secret.
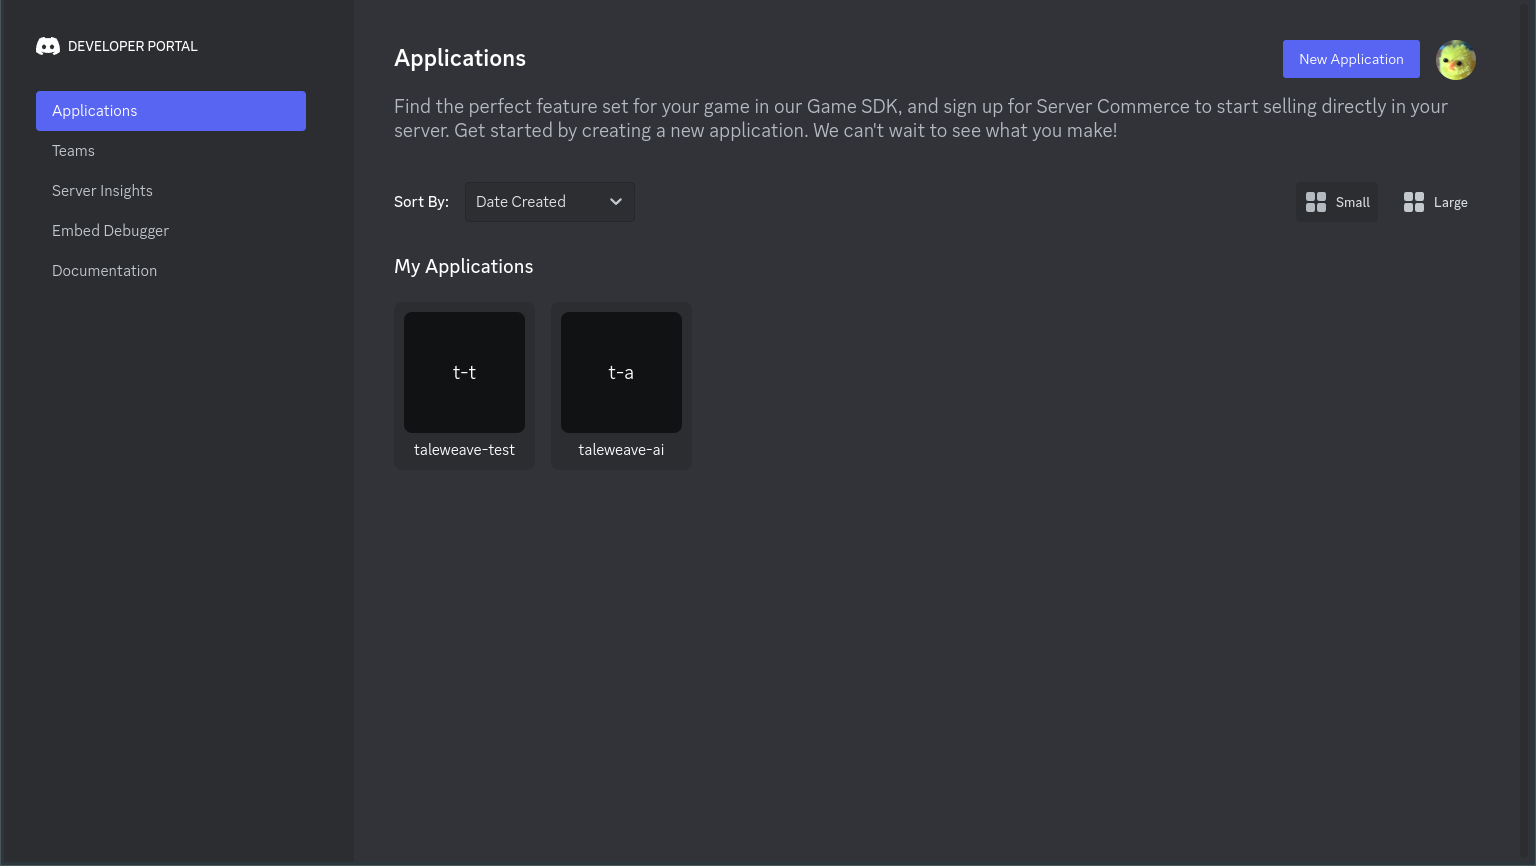
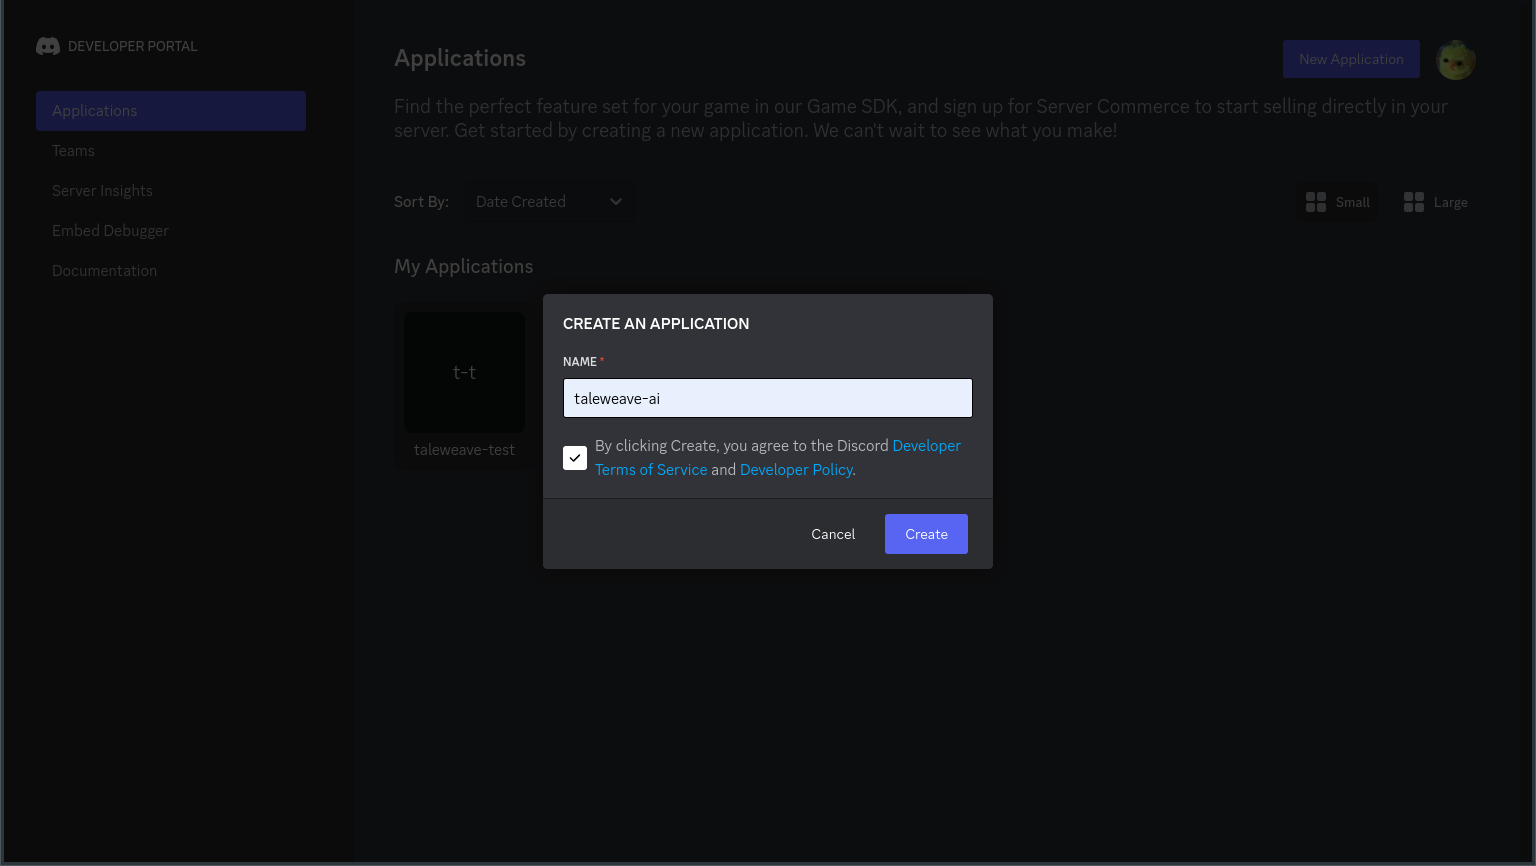
Visit the Discord Developer Portal and create a New Application:
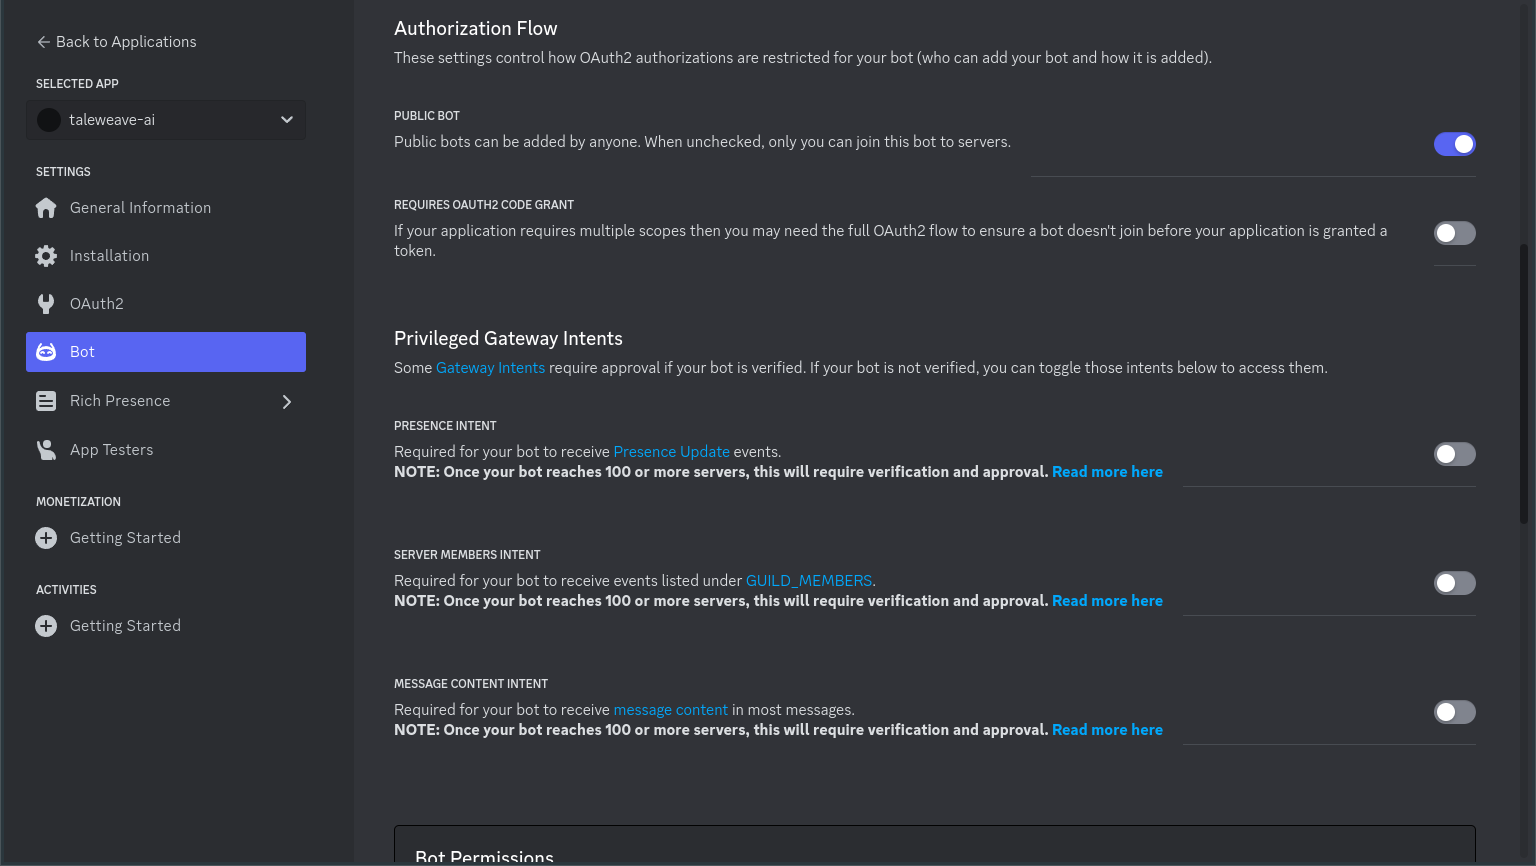
On the Bot tab, configure the username, icon, and make sure the Public Bot option is checked:

Copy the bot's token and save it to your password manager. This is effectively your bot's password and will be used when you configure the server.
- https://discordpy.readthedocs.io/en/stable/discord.html
- https://discordjs.guide/preparations/adding-your-bot-to-servers.html#bot-invite-links
Invite the Discord bot to your server
Once you have the Discord bot set up, you will need to invite it to any servers where you want to play the game.
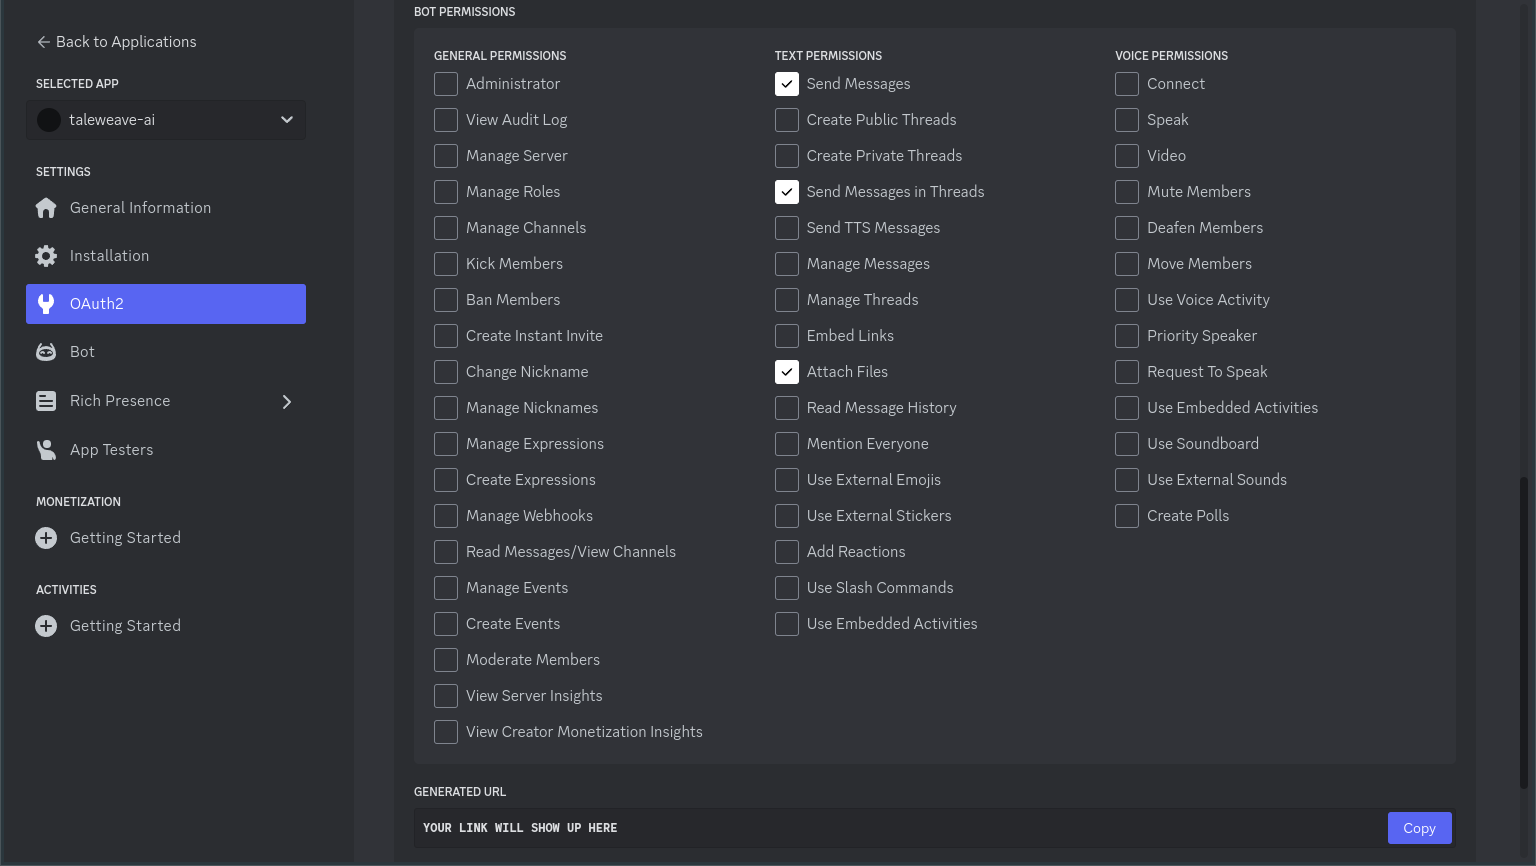
On the OAuth2 tab, use the URL Generator to create an invite link.
In the Scopes menu, select bot.
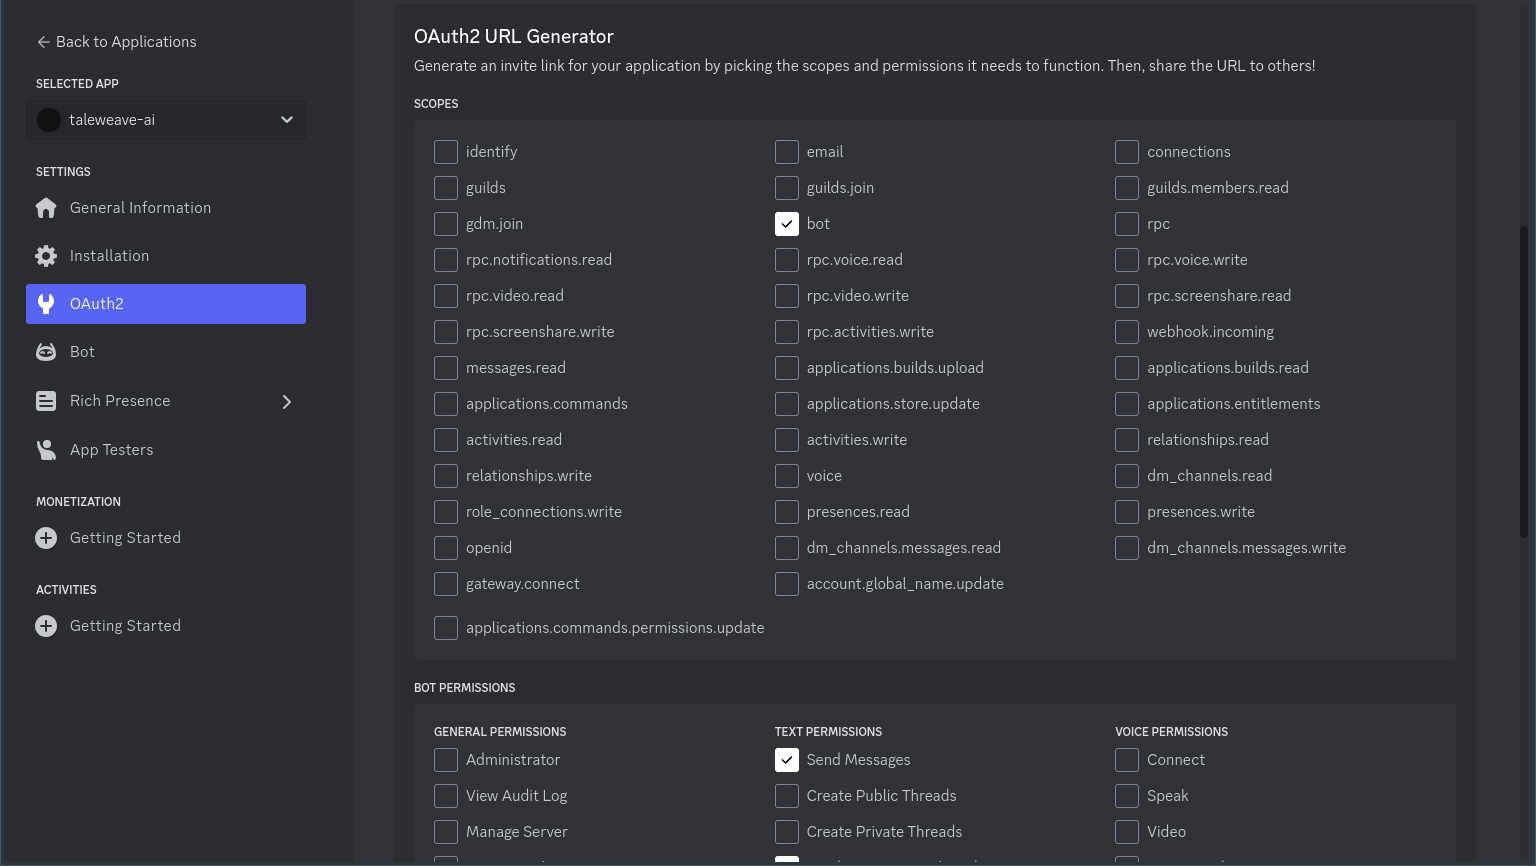
In the Bot Permissions menu, select Send Messages, Send Messages in Threads, and if you are rendering images,
Attach Files.
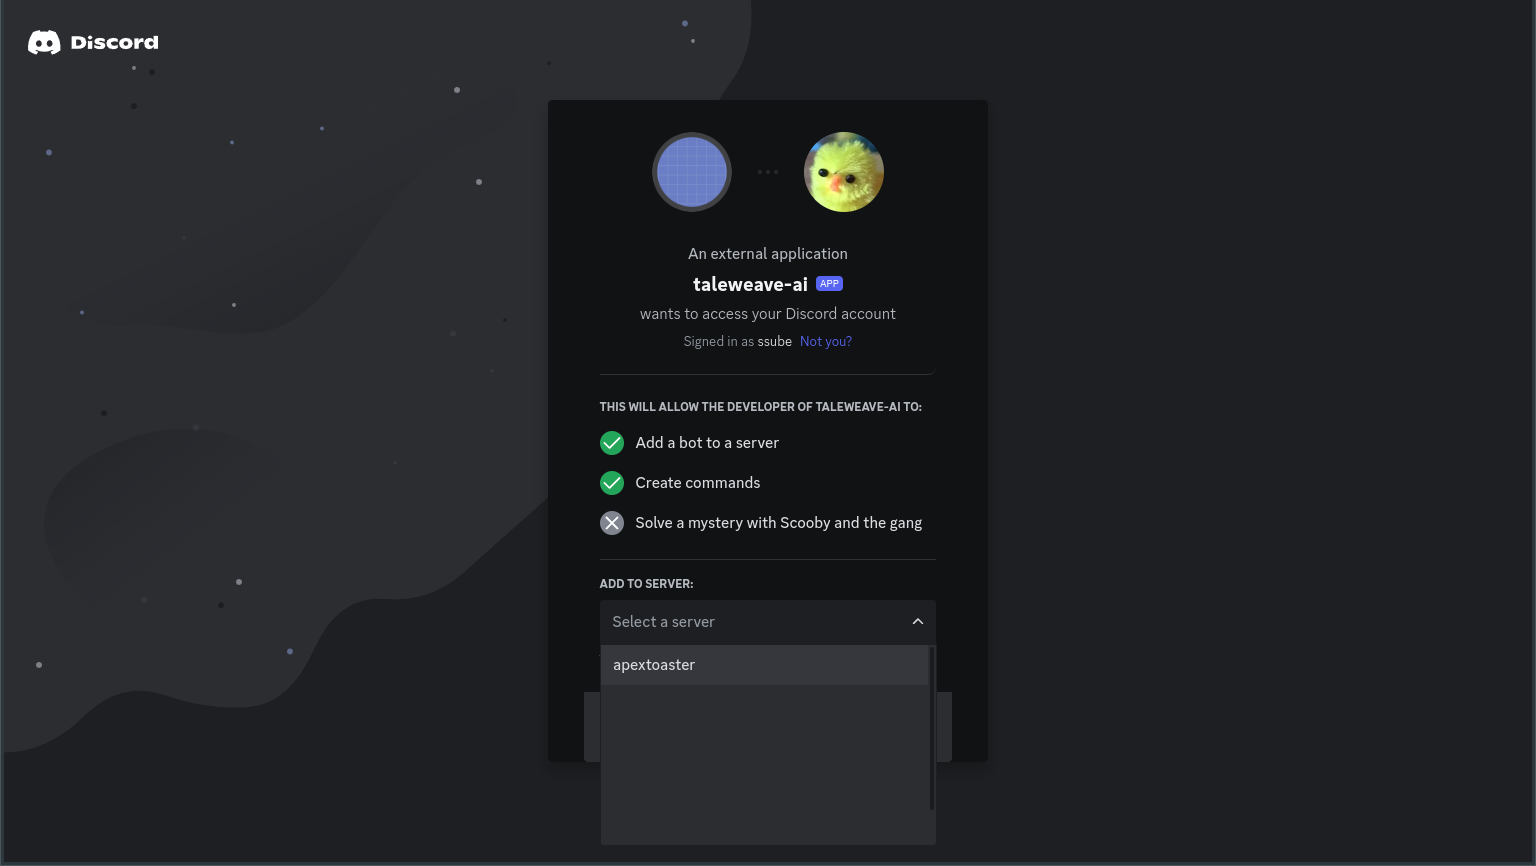
Copy the Generated URL and paste it into your browser. The authorization screen will show a list of servers that
you can add the bot to in the Add To Server menu:
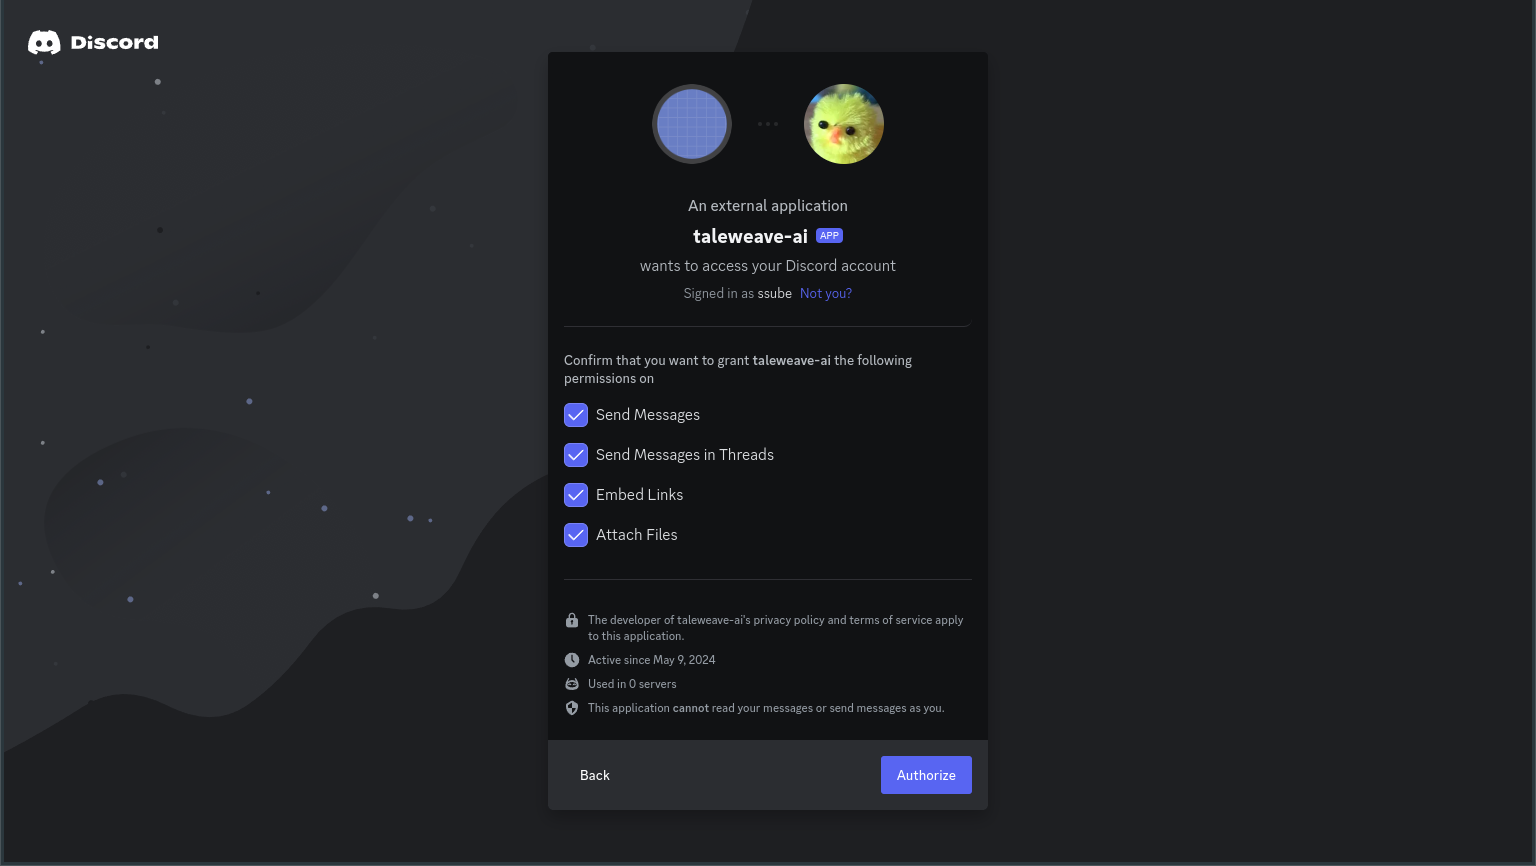
Select the server where you want to play TaleWeave and click Continue. Make sure the permissions shown match the
ones that you selected before, then click Authorize.
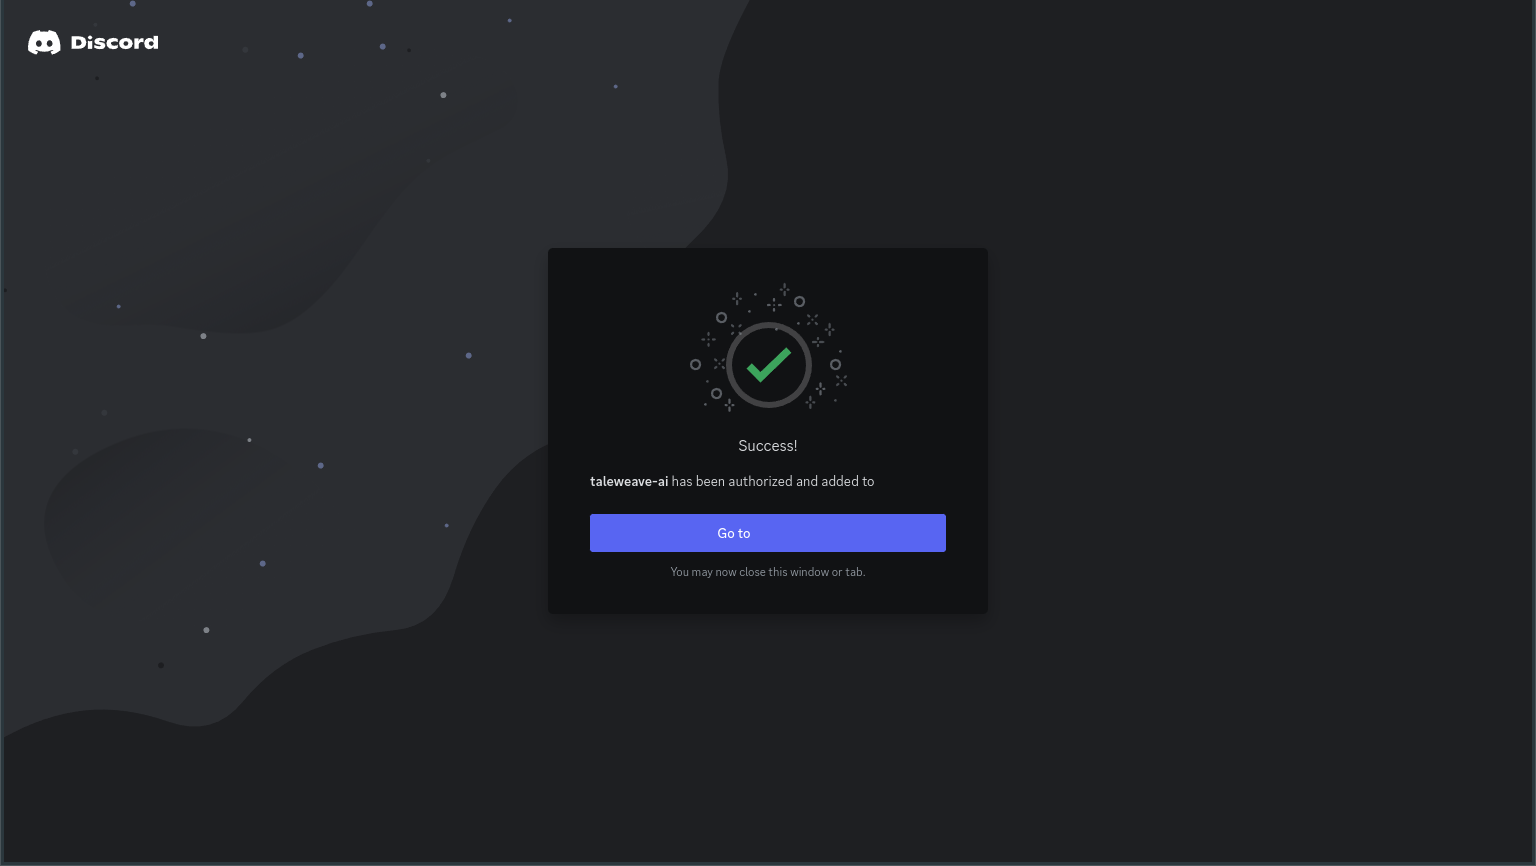
You should see a success page, with a redirect to the server that you chose before. You can follow this link or close the browser and connect to Discord through the desktop or mobile apps.
Configure
Configure the server environment
Create a file called .env and add the following variables:
# ollama
PACKIT_DRIVER=ollama
PACKIT_MODEL=dolphin-llama3:70b
OLLAMA_NUM_GPU=100
OLLAMA_NUM_CTX=8192

# servers
COMFY_API="127.0.0.1:8188"
OLLAMA_API=http://127.0.0.1:11434

# secrets
DISCORD_TOKEN=YOUR_TOKEN
Configure the Discord bot
Copy the config.yaml file to a file named custom_config.yaml and edit the bot section to use your desired
parameters for the Discord bot. Make sure the list of channels includes one or more valid channels in the servers
to which you invited the bot. By default, this is a channel named taleweave.
bot:
  discord:
    channels: [taleweave]
    command_prefix: "!"
    name_command: taleweave
    name_title: TaleWeave AI
The name_* fields are used by the bot to refer to itself in messages.
Recommended: Configure image generation
Note: This step is required if you are using the --render or --render-generated command-line arguments. If you
launched ComfyUI, do this step too.
In your custom_config.yaml, edit the render section to use your desired parameters for image generation. Make sure
the checkpoints are valid file names in your checkpoints folder. If you provide more than one checkpoint, one will be
randomly selected for each batch of images. Adjust the sizes as needed to match the checkpoint and control your memory
usage.
render:
  cfg:
    min: 5
    max: 8
  checkpoints: [
    "diffusion-sdxl-dynavision-0-5-5-7.safetensors",
  ]
  path: /tmp/taleweave-images
  sizes:
    landscape:
      width: 1280
      height: 960
    portrait:
      width: 960
      height: 1280
    square:
      width: 1024
      height: 1024
  steps:
    min: 30
    max: 50
Optional: Configure websocket server
Note: You only need to do this step if you want to change the host or port where the websocket server will listen.
In your custom_config.yaml, edit the server section to change the host and port where the websocket server will
listen for connections:
server:
  websocket:
    host: 0.0.0.0
    port: 8001
Using ports < 1024 on Linux requires additional permissions. Please consider putting a load balancer like nginx in front of the websocket server.
Optional: Configure world size
Note: You only need to do this step if you want to change the size of the world during generation.
In your custom_config.yaml, edit the world section to change the size of the rooms and character inventory while
generating the world.
world:
  size:
    character_items:
      min: 0
      max: 3
    item_effects:
      min: 0
      max: 1
    portals:
      min: 1
      max: 3
    rooms:
      min: 3
      max: 6
    room_characters:
      min: 1
      max: 3
    room_items:
      min: 0
      max: 3
Running locally
Checklist for running locally
- clone TaleWeave AI
- set up a virtual environment
- install the pip dependencies
- launch Ollama
- and pull a model
- or launch vLLM
- or get an OpenAI API key
- recommended: launch ComfyUI
- download a checkpoint
- register a Discord bot
- invite the Discord bot to your server
- configure the server environment
- set packit driver
- set packit model
- set ComfyUI API
- set Ollama API
- set Discord token
- configure the Discord bot
- set or create the
channels
- set or create the
- recommended: configure the checkpoint for ComfyUI
- choose a world template
- or come up with a world prompt
- launch the game server
Choose a world prompt or template
The world prompt has two parts: the main theme and the secondary flavor text used by the dungeon master and world builder to make a more unique and interesting world.
Some world templates are provided in the taleweave/worlds.yaml file, which you can
use to get started, or create your own prompt and generate a unique world.
Example world templates include:
outback-animals- talking animal truckers in the Australian outback
grimdark-hedgehogs- grimdark future where humans wage a desperate war for survival against hedgehogs
nyc-apartment- crowded apartment building in New York City
cyberpunk-utopia- wealthy cyberpunk utopia with a dark secret
haunted-house- haunted house in the middle of nowhere
magical-kingdom- dangerous magical fantasy world
cryptid-town- a mysterious town in the Pacific Northwest filled with strange cryptids and private investigators searching for them
jurassic-park- opening scenes from Jurassic Park
star-wars- opening scenes from Star Wars
These templates include a variety of different settings to show how flexible the world generator can be. You can use a brief idea, a more detailed setting, summarize a short story, or even use well-known pop culture references (results will be better for classic movies and literature than lesser-known media).
Launch the game
To start a game simulation using the "outback animals" example prompt and running both the Discord both and websocket server:
# Start the TaleWeave AI engine
python3 -m taleweave.main \
  --config config.yaml \
  --prompts prompts/llama-*.yaml prompts/discord-en-us.yaml \
  --world worlds/outback-animals-1 \
  --world-template ./worlds.yaml:outback-animals \
  --discord  \
  --render \
  --render-generated \
  --server \
  --rooms 3 \
  --turns 30 \
  --optional-actions \
  --actions taleweave.actions.core taleweave.actions.optional taleweave.systems.sim:init_actions \
  --systems taleweave.systems.core taleweave.systems.sim:init_logic
This will generate a relatively small world with 3 rooms or areas, run for 30 steps, then save the game and shut down.
The world will be saved to a file named worlds/outback-animals-1.json and the state will be saved after each step to
another file named worlds/outback-animals-1.state.json. The world can be stopped at any time by pressing Ctrl-C,
although the step in progress will be lost. The saved state can be resumed and played for any number of additional
steps by running the server again with the same arguments.
Note:
module.name:function_nameandpath/filename.yaml:keyare patterns you will see repeated throughout TaleWeave AI. They indicate a Python module and function within it, or a data file and key within it, respectively.
The optional actions are actions that allow characters to explore and expand the world during the game, discovering new rooms and generating new items. These can be slower than the base game actions, so you may want to disable them if you are running the LLM on CPU.
The sim systems provide many mechanics from popular life simulations, including hunger, thirst, exhaustion, and mood (only SFW mechanics are included, I'm afraid). Custom actions and systems can be used to provide any other mechanics that are desired for your setting. The logic system uses a combination of Python and YAML to modify the prompts connected to rooms, characters, and items in the world, influencing the behavior of the language models.
Connect and play
Running on RunPod
Checklist for running on RunPod
- launch Ollama pod
- pull a model
- recommended: launch ComfyUI pod
- download or upload a checkpoint
- register a Discord bot
- invite the Discord bot to your server
- configure the TaleWeave AI template
- set packit driver
- set packit model
- set ComfyUI API
- set Ollama API
- set Discord token
- configure the Discord bot
- set or create the
channels
- set or create the
- recommended: configure the checkpoint for ComfyUI
- choose a world template
- or come up with a world prompt
- configure TaleWeave AI template
- launch TaleWeave AI pod
- upload config
- restart pod