58 KiB
User Guide
This is the user guide for ONNX web, a web GUI for running ONNX models with hardware acceleration on both AMD and Nvidia system, with a CPU software fallback.
The API is written in Python and runs on both Linux and Windows and provides access to the major functionality of diffusers, along with metadata about the available models and accelerators, and the output of previous runs. Hardware acceleration is supported on both AMD and Nvidia for both Linux and Windows, with a CPU fallback capable of running on laptop-class machines.
The GUI is written in Javascript, hosted on Github Pages, and runs in all major browsers, including on mobile devices. It allows you to select the model and accelerator being used for each image pipeline. Image parameters are shown for each of the major modes, and you can either upload or paint the mask for inpainting and outpainting. The last few output images are shown below the image controls, making it easy to refer back to previous parameters or save an image from earlier.
Please see the server admin guide for details on how to configure and run the server.
Contents
- User Guide
- Contents
- Outline
- Prompts
- Pipelines
- Tabs
- Txt2img tab
- Scheduler parameter
- Eta parameter
- CFG parameter
- Steps parameter
- Seed parameter
- Batch size parameter
- Tile size parameter
- Overlap parameter
- UNet stride parameter
- Tiled VAE parameter
- Prompt parameter
- Negative prompt parameter
- Width and height parameters
- Highres parameters
- Upscale and correction parameters
- Img2img tab
- Inpaint tab
- Upscale tab
- Blend tab
- Models tab
- Settings tab
- Txt2img tab
- Adding your own models
- Environment variables
- Known errors
- Check scripts
- Client errors
- Server errors
- Very slow with high CPU usage, max fan speed during image generation
- Connection refused or timeouts
- Error: name 'cmd' is not defined
- CUDA driver version is insufficient for CUDA runtime version
- Command 'python' not found or Command 'pip' not found
- AttributeError: module 'numpy' has no attribute 'float'
- Numpy invalid combination of arguments
- ONNXRuntimeError: The parameter is incorrect
- The expanded size of the tensor must match the existing size
- Shape mismatch attempting to re-use buffer
- Cannot read properties of undefined (reading 'default')
- Output Image Sizes
Outline
What is ONNX web (and what it is not)
ONNX web is a responsive web GUI, in both style and performance, for running ONNX models using hardware acceleration on any reasonable platform (one with sufficient memory for the models, that can build scipy within 24 hours, etc).
The client should do some reasonable validation of input parameters should be done, such as prompt length, pipeline and scheduler combinations, and output size. Tabs and options should be disabled when they are not compatible with the selected models.
Models should be run with hardware acceleration whenever possible, even if that means converting the data files and helpers. When models cannot be run using the available hardware providers, a CPU fallback should be available to provide the same features across as many platforms as possible.
The API should be easy to use with command line tools, for testing and in real usage. It should behave well when placed behind a load balancer, restrictive firewall (including restrictions on outgoing traffic), and when being used by more people than there are available GPU resources. It should be easy to run on a laptop or use in a hosted notebook.
This is not a general purpose image editor. There are better tools for that already. The inpainting and blending tabs will need a simple drawing component, but anything more complicated, like layers and blending modes, should be done in the Gimp, Krita, or Photoshop.
This is not a tool for building new ML models. While I am open to some training features, like Dreambooth and anything needed to convert models, that is not the focus and should be limited to features that support the other tabs.
Modes and tabs
- txt2img
- generate a new image from a text prompt
- img2img
- modify an existing image using a text prompt
- inpaint
- modify parts of an existing image using an opacity mask
- includes outpaint
- upscale
- resize an existing image
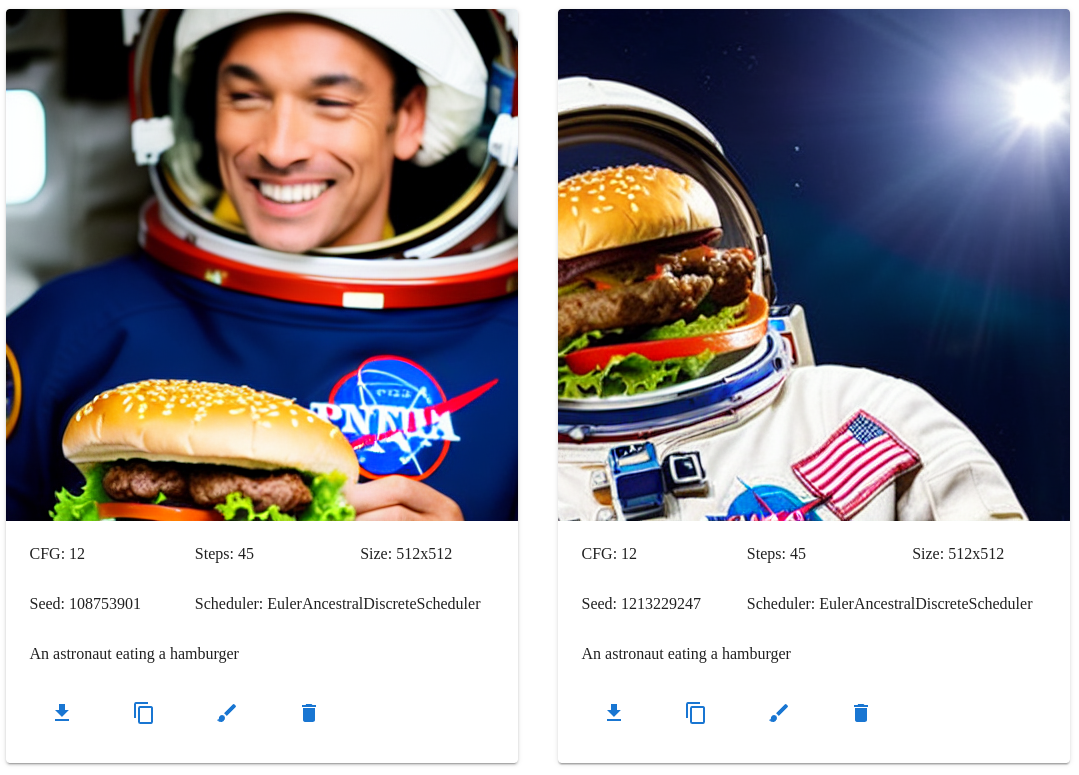
Image history
Below the tab control is the image history section. The image history setting controls the number of images that are shown. You can use the controls in each image card to download the output, copy to the source image parameters for img2img and inpaint, and delete the image from history if you don't like it.
An astronaut eating a hamburger
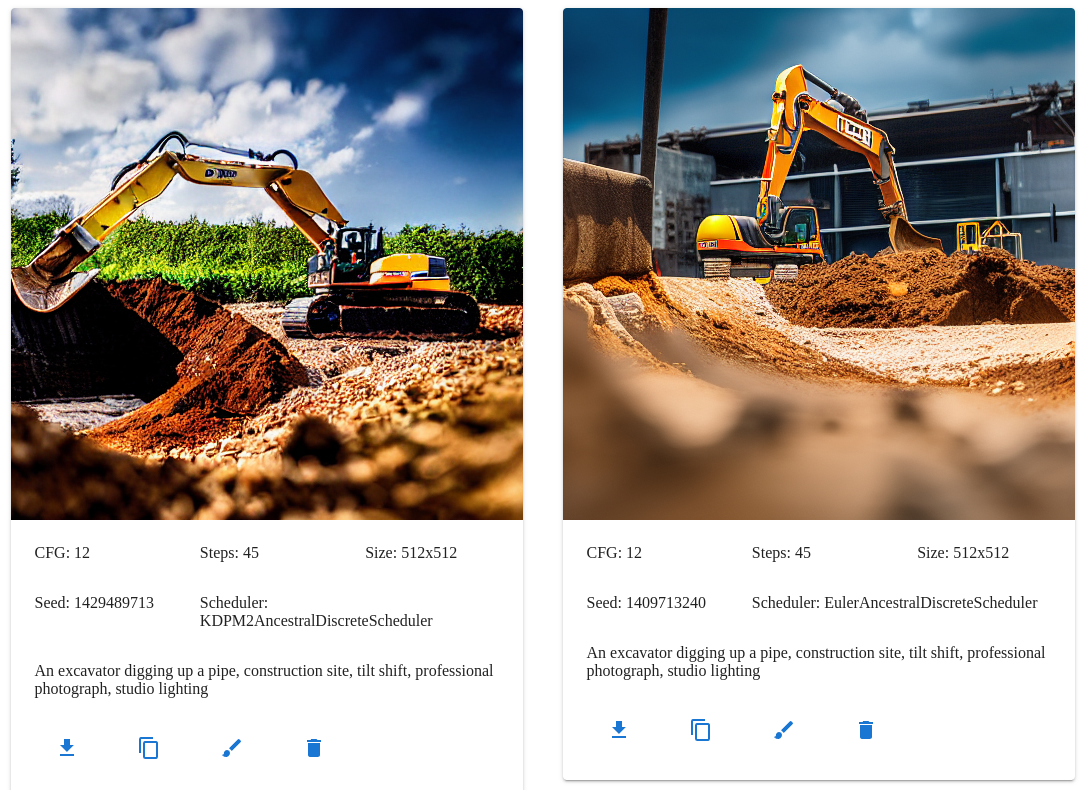
Scheduler comparison
The Stable Diffusion pipeline can be run using different schedulers, which generally produce similar results but each have their own advantages. Some schedulers are faster than other or require fewer steps, especially the recent DEIS multistep and Euler Ancestral schedulers.
- https://huggingface.co/docs/diffusers/main/en/using-diffusers/schedulers#compare-schedulers
- https://i.imgur.com/2pQPgf0.jpeg
An excavator digging up a pipe, construction site, tilt shift, professional photograph, studio lighting
Model and network types
The ONNX runtime is a library for accelerating neural networks and machine learning models, using the ONNX file format to share them across different platforms. ONNX web is a server to run hardware-accelerated inference using those models and a web client to provide the parameters and view the results.
The models used by ONNX web are split up into four groups:
- Diffusion
- general models like Stable Diffusion
- specialized models like Knollingcase or OpenJourney
- Upscaling
- Correction
- Networks
There are many other models available and specialized variations for anime, TV shows, and all sorts of other styles. You can add your own models from many sources, including the HuggingFace hub and Civitai.
Prompts
General structure
TODO
Useful keywords
The OpenArt Stable Diffusion Prompt Book has a lot of useful tips on how to build a good prompt. You can include keywords to describe the subject, setting, style, and level of detail. Throwing a few extra keywords into the end of the prompt can help add specific details, like the color and intensity of the lighting.
Prompt tokens
You can blend extra networks with the diffusion model using <type:name:weight> tokens. There are menus in the
client for each type of additional network, which will insert the token for you.
The type must be one of clip, inversion, or lora.
The name must be alphanumeric and must not contain any special characters other than - and _.
The weight must be a number. For clip, it must be a positive integer. For inversion and lora, it can be an
integer or decimal number and may be negative.
LoRA and LyCORIS tokens
You can blend one or more LoRA weights with the ONNX diffusion model using a
lora token:
<lora:name:0.5>
LoRA models must be placed in the models/lora directory and may be any supported tensor format.
The type of network, name, and weight must be separated by colons. The LoRA name must be alphanumeric and must not
contain any special characters other than - and _.
LoRA weights often have their own keywords, which can be found on their model card or Civitai page. You need to use
the <lora:name:1.0> token and the keywords to activate the LoRA.
Check out the kohya-ss/sd-scripts repository for more details.
Textual Inversion tokens
You can blend one or more Textual Inversions with the ONNX diffusion model
using the inversion token:
<inversion:autumn:1.0>
Textual Inversion embeddings must be placed in the models/inversion directory and may be any supported tensor format.
The type of network, name, and weight must be separated by colons. The Textual Inversion name must be alphanumeric
and must not contain any special characters other than - and _.
Once the Textual Inversion has been blended, you can activate some or all of its layers using the trained token(s)
in your prompt. Every Textual Inversion is available using its name, as well as tokens for all of the layers and for
each individual layer. For an embedding called autumn, the available tokens are:
autumnautumn-allautumn-0throughautumn-5
The autumn and autumn-all tokens both activate a layer with the sum weights of the others. This will have a
similar effect, but will not represent as many tokens in the prompt and may not attract as much attention. You need to
use the <inversion:name:1.0> token and the layer tokens to activate the Textual Inversion.
You can use a range of the numbered layer tokens using the base-{X,Y} syntax in your prompt, where X is inclusive
and Y is not. The range autumn-{0,5} will be expanded into the tokens autumn-0 autumn-1 autumn-2 autumn-3 autumn-4.
You can provide a step as the third parameter, which will skip layers: even-layers-{0,100,2} will be expanded into
even-layers-0 even-layers-2 even-layers-4 even-layers-6 ... even-layers-98. Some Textual Inversions only have a
single layer and some have 75 or more. You can use the layer tokens individually, out of order, and repeat some layers
or omit them entirely.
Note: The token range syntax currently does not work when long prompt weighting is enabled.
Some Textual Inversions have their own token, especially ones trained using the Stable Conceptualizer notebook
and the sd-concepts-library on
HuggingFace hub. The model card should list the token, which will usually be wrapped in <angle-brackets>. This token
will be available along with the name token, but these concepts only have a single layer, so the numbered tokens are
much less useful. For a concept called cubex with the token <cube>, the available tokens are:
cubex<cube>cubex-0
CLIP skip tokens
You can skip the last layers of the CLIP text encoder using the clip token:
<clip:skip:2>
This makes your prompt less specific and some models have been trained to work better with some amount of skipping.
Long prompt weighting syntax
You can emphasize or deemphasize certain parts of the prompt by using the long prompt weighting option. This adds some additional tokens:
(word)increases attention by 10%((word))increases attention by 21% (10% * 10%)[word]decreases attention by 10%[[word]]decreases attention by 21% (10% * 10%)(word:1.5)increases attention by 50%\(word\)inserts literal parentheses
Note: The token range syntax currently does not work when long prompt weighting is enabled.
Pipelines
The pipelines in onnx-web allow you to run Stable Diffusion in many different ways, such as ControlNet and using the long prompt weighting syntax.
If you select a pipeline that is not valid for the current tab, the default pipeline for that tab will be used instead.
Stable Diffusion pipeline
TODO
ControlNet pipeline
The ControlNet pipeline
img2img pipeline
TODO
Inpaint pipeline
TODO
Long prompt weighting pipeline
TODO
Panorama pipeline
TODO
Instruct pix2pix pipeline
TODO
Txt2Img pipeline
TODO
Upscale pipeline
TODO
Tabs
Txt2img tab
The txt2img tab turns your wildest ideas into something resembling them, maybe.
This mode takes a text prompt along with various other parameters and produces a new image.
Scheduler parameter
This selects the scheduler algorithm used to resolve the latent noise into a coherent image.
See the scheduler comparison for more details.
Eta parameter
TODO
CFG parameter
Classifier free guidance. How strictly the model should follow the prompt. Anything from 5 to 15 usually works. More is not always better, setting this too high can result in noisy, solarized images.
Roughly:
- 2-6 allows the AI to be creative
- 7-11 treats the prompt as a suggestion
- 12-15 strongly encourages the AI to follow the prompt
- 16-20 follows the prompt whether it makes sense or not
Steps parameter
The number of scheduler steps to run. Using more steps often results in an image with more details, but also takes longer to run.
The Euler Ancestral scheduler can usually produce decent results in 30-45 steps, while some of the others need 80-100 or more. Inpainting may need more steps, up to 120 or 150 in some cases. Using too many steps can increase the contrast of your image too much, almost like a posterize effect.
Seed parameter
The seed value used for the random number generators. This is a lot like the seed in a game like Minecraft and can be shared to produce similar images, but producing exactly the same image requires the same model, scheduler, and all of the other parameters as well.
You can use the same prompt and seed, while varying the steps and CFG, to produce similar images with small variations.
Using -1 will generate a new seed on the server for each image.
Batch size parameter
TODO
Tile size parameter
TODO
Overlap parameter
TODO
UNet stride parameter
TODO
Tiled VAE parameter
TODO
Prompt parameter
The input text for your image, things that should be included.
A puppy dog with wings flying over a deciduous forest, drone, detailed, daylight, wide angle, sports, action camera
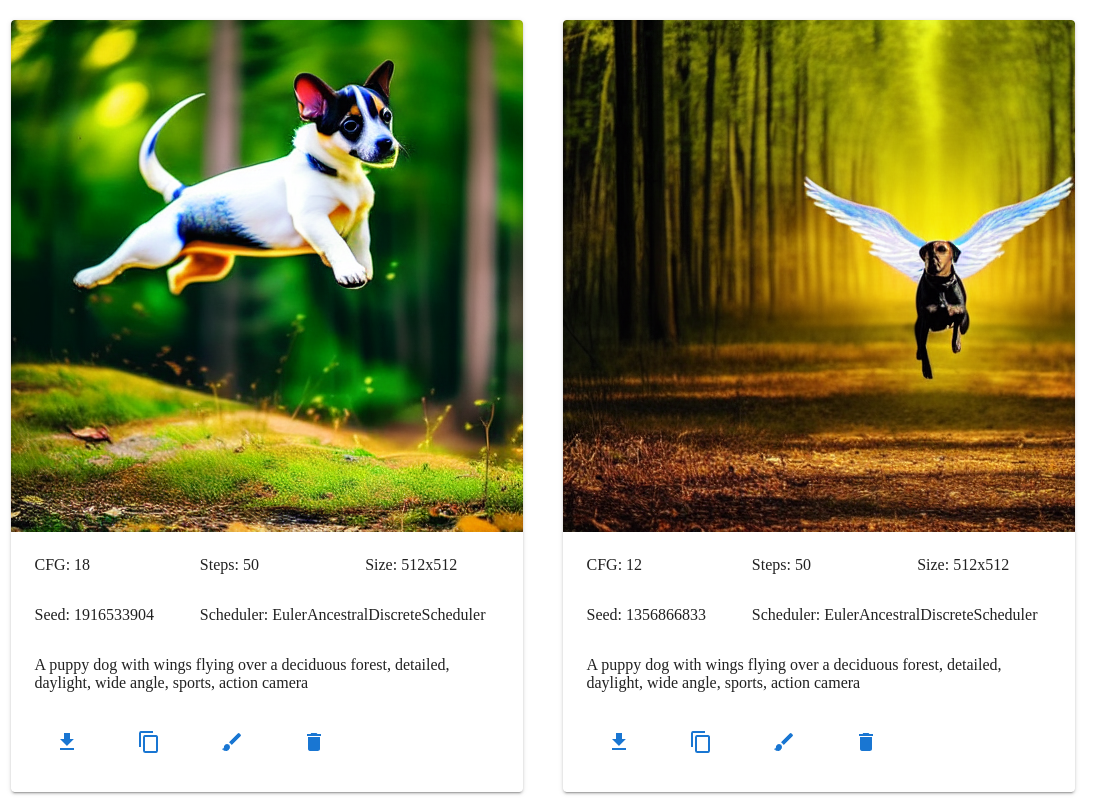
The models will not always follow the prompt exactly, even with a fairly large CFG value, and you may need to try a few times.
A stone magnifying glass showing a portal to another dimension, steam punk, mysterious, alternate universe, highly detailed, digital illustration
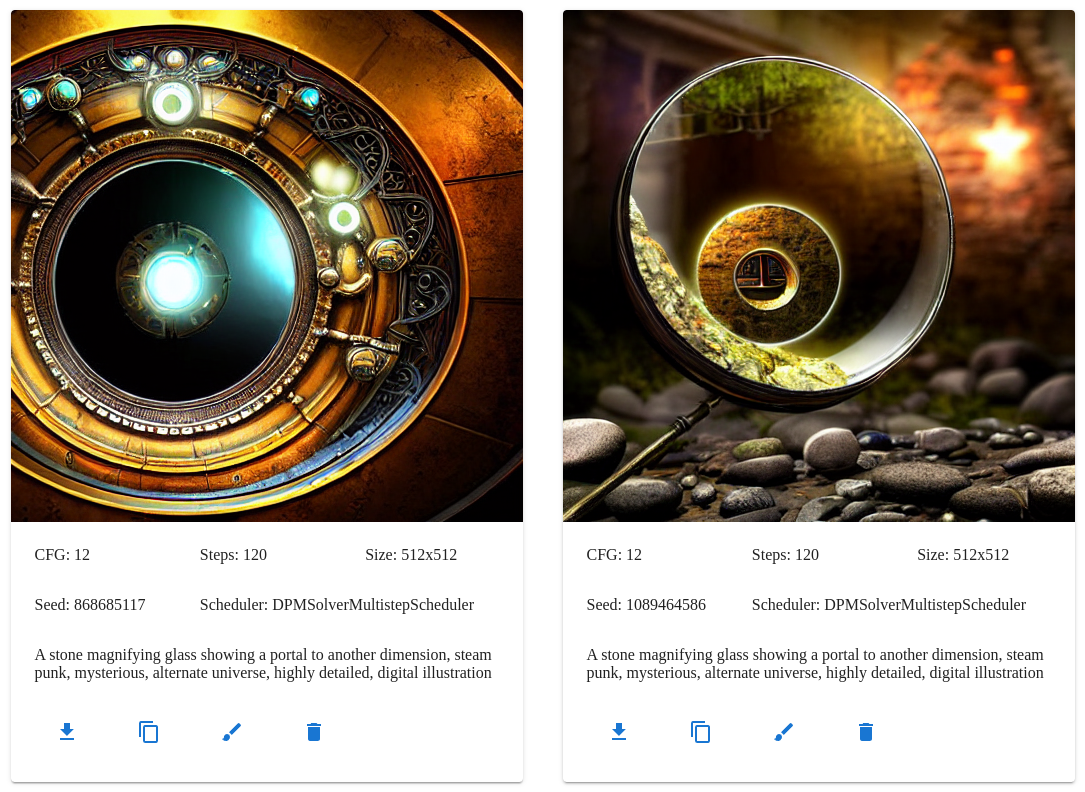
More complex scenes will often need more steps to get good results in the peripheral details. You can adjust the level of detail with keywords like "highly detailed" and "intricate" and adjust the art style with "digital illustration" or "oil painting."
Negative prompt parameter
The opposite of the prompt parameter, things that should not be included.
poorly drawn faces, poorly drawn hands, distorted
Width and height parameters
Controls the size of the output image, before upscaling.
Highres parameters
TODO
Upscale and correction parameters
TODO: these allow you to use the upscale and face correction models with other pipelines
Img2img tab
The img2img tab takes a source image along with the text prompt and produces a similar image. You can use the strength parameter to control the level of similarity between the source and output.
The output image will be the same size as the input, unless upscaling is turned on.
Img2img source image
Upload a source image for img2img.
Image sources are not persisted when you reload the page, unlike other parameters.
Strength parameter
Blending strength. 0 uses the source image without changing it, 1 will replace it almost entirely.
Inpaint tab
The inpaint tab provides a way to edit part of an image and run the diffusion pipeline again, without editing the entire image. It still takes a text prompt, but uses a mask to decide which pixels should be regenerated.
The mask can be uploaded or edited directly in the browser. White pixels in the mask will be replaced with pixels from the noise source, then replaced again by the diffusion pipeline. Black pixels in the mask will be kept as they appeared in the source. The mask can use gray values to blend the difference.
When all of the options are used together, the process is:
- Add borders to the source image
- Generate the noise source from the source image and random data
- Run the mask filter on the mask image
- Blend the source image and the noise source using the mask image (pre-multiply)
- Apply the diffusion model to the source image using the mask image to weight pixels
- Apply the upscaling and correction models to the output
- Save the output
Inpaint source image
Upload a source image for inpaint.
Image sources are not persisted when you reload the page, unlike other parameters.
Mask canvas and brush parameters
Upload or draw a mask image.
White pixels will be replaced with noise and then regenerated, black pixels will be kept as-is in the output.
Image sources are not persisted when you reload the page, unlike other parameters. If you want to keep a mask you have painted in the browser, right click on the canvas and use the "Save image as..." option.
- Fill with black
- Keep all pixels
- Fill with white
- Replace all pixels
- Invert
- Replace black pixels with white and vice versa
- If you accidentally painted a good mask in the wrong color, this can save it
- Gray to black
- Convert gray parts of the mask to black (keep them)
- Gray to white
- Convert gray parts of the mask to white (replace them)
Mask filter parameter
Mask filters are used to pre-process the mask before blending the source image with the noise and before running the diffusion pipeline.
- None
- no mask filter
- usually a fine option
- Gaussian Multiply
- blur and darken the mask
- good when you want to soften and expand the edges of the area to be kept
- Gaussian Screen
- blur and lighten the mask
- good when you want to soften and expand the edges of the area to be replaced
Noise source parameter
Noise sources are used to create new data for the next round of diffusion. Sometimes adding noise can improve the results, but it may also be too much. A variety of sources are provided.
- Fill Edges
- fill the edges of the image with a solid color
- only changes the image when used with outpainting
- Fill Masked
- fills the edges and masked areas of the image with a solid color
- Gaussian Blur
- blur the source image
- fills the edges with noise when used with outpainting
- a good option for finishing the edges of an image
- Histogram Noise
- fills the edges and masked area with noise matching the source color palette
- noise color is based on the color frequency in the source histogram
- a good option for continuing to build an image
- Gaussian Noise
- fills the edges and masked area with Gaussian noise
- Uniform Noise
- fills the edges and masked area with uniform noise
Outpaint parameters
The number of pixels to add in each direction.
Upscale tab
The upscale tab provides a dedicated way to upscale an image and run face correction using Real ESRGAN and GFPGAN, without running a diffusion pipeline at all. This can be faster and avoids making unnecessary changes to the image.
Resize the output image before returning it to the client.
TODO: include other upscale models
Enabling this will run Real ESRGAN and requires an upscaling model.
Check out the Real ESRGAN Github for more details.
Scale parameter
The output scale for Real ESRGAN. This output will be rescaled using the outscale parameter.
Outscale parameter
The final output scale after running Real ESRGAN. This can increase or decrease the size of the final output. Lanczos interpolation is used when the outscale is greater than the scale.
Denoise parameter
The amount of denoising to apply when using the RealESR x4 v4 model. Can be used to avoid over-smoothing the results.
Face correction and strength
Run face correction the the output image before returning it to the client.
Enabling this will run GFPGAN and requires a correction model.
Check out the GFPGAN Github for more details.
Blend tab
The blend tab provides a way to blend two images together by painting a mask.
The mask can be uploaded or edited directly in the browser. The first image will be used as the source for black pixels in the mask and the second image will be used as the source for white pixels. Gray values will blend the two.
Upscaling and correction run after the images have been blended.
Models tab
TODO
Settings tab
The settings tab provides access to some of the settings and allows you to reset the state of the other tabs to the defaults, if they get out of control.
Image history setting
The image history setting allows you to change the number of images kept in the recent image history. If you are generating very large images or have limited memory, reducing this may improve performance. Increasing this will keep more images in history. Output is always kept on the server.
API server setting
Changing the API server will reload the client.
Reset tab buttons
Resets the state of each tab to the default, if some controls become glitchy.
Adding your own models
You can convert and use your own models without making any code changes. Models are stored in
the models/extras.json file - you can make a copy to avoid any updates replacing your models in
the future. Add an entry for each of the models that you would like to use:
{
  "diffusion": [
    {
      "name": "diffusion-knollingcase",
      "source": "Aybeeceedee/knollingcase"
    },
    {
      "name": "diffusion-openjourney",
      "source": "prompthero/openjourney"
    },
    {
      "name": "diffusion-stablydiffused-aesthetic-v2-6",
      "source": "civitai://6266?type=Pruned%20Model&format=SafeTensor",
      "format": "safetensors"
    },
    {
      "name": "diffusion-unstable-ink-dream-onnx-v6",
      "source": "civitai://5796",
      "format": "safetensors"
    }
  ],
  "correction": [],
  "upscaling": [
    {
      "name": "upscaling-real-esrgan-x4-anime",
      "source": "https://github.com/xinntao/Real-ESRGAN/releases/download/v0.2.2.4/RealESRGAN_x4plus_anime_6B.pth",
      "scale": 4
    }
  ],
  "networks": [
    {
      "name": "cubex",
      "source": "sd-concepts-library/cubex",
      "format": "ckpt",
      "label": "Cubex",
      "type": "inversion"
    },
    {
      "name": "minecraft",
      "source": "sd-concepts-library/minecraft-concept-art",
      "format": "ckpt",
      "label": "Minecraft Concept",
      "type": "inversion"
    },
  ],
  "sources": [
    {
      "name": "vae-ft-mse-840000-ema-pruned",
      "source": "https://huggingface.co/stabilityai/sd-vae-ft-mse-original/resolve/main/vae-ft-mse-840000-ema-pruned.safetensors",
      "format": "safetensors"
    }
  ]
}
The complete file format and available keys are listed in the file format section. If you are familiar with JSON schemas, the extras schema is the canonical format.
Models can be added using the directory format used by diffusers as well as safetensor and pickle tensor checkpoints.
See the converting models guide for more details.
Be careful loading pickle tensors, as they may contain unsafe code which will be executed on your machine. Use safetensors instead whenever possible.
Set the ONNX_WEB_EXTRA_MODELS environment variable to the path to your file if not using the models/extras.json file. For example:
# on Linux:
> export ONNX_WEB_EXTRA_MODELS=~/onnx-web-extras.json
> ./launch-extras.sh

# on Windows:
> set ONNX_WEB_EXTRA_MODELS=C:\Users\ssube\onnx-web-extras.json
> launch-extras.bat
Extras using the older file format with nested arrays ("diffusion": [[]]) can be mixed with the newer format. You
only need to convert them into the newer format if you need to use keys other than name, source, and scale.
Model names
The name of each model dictates which category it will appear in on the client.
diffusion-*orstable-diffusion-*for diffusion modelsupscaling-*for upscaling modelscorrection-*for correction models
Models that do not match one of the prefixes will not be shown, so if you cannot find a model that you have converted,
make sure it is named correctly. This applies to models in the extras.json file as well as models you have created,
converted, or copied outside of the conversion script.
Model sources
You can either provide the path to a local model that you have already downloaded or provide a URL to be automatically downloaded, using HTTPS or one of the pre-defined sources:
huggingface://- https://huggingface.co/models?other=stable-diffusion
- mostly SFW
- requires an account to download some models
civitai://- https://civitai.com/
- some NSFW
- does not require an account
https://- any other HTTPS source
../models/.cache/your-model.safetensors- relative paths
/home/ssube/onnx-web/models/.cacheorC:\Users\ssube\onnx-web\models\.cache- absolute paths
If the model is a single file and the source does not include a file extension like .safetensors or .ckpt, make
sure to indicate the file format using the format key. You do not need to provide the format for directories and
models from the HuggingFace hub.
Downloading models from Civitai
Use the civitai:// protocol to download models from the Civitai catalog.
When downloading models from Civitai, the ID shown in the browser URL bar may not be the ID of the model itself. Since models can have multiple versions, make sure you use the correct ID. Use the model ID from the download link, which you can see and copy from the right-click menu:
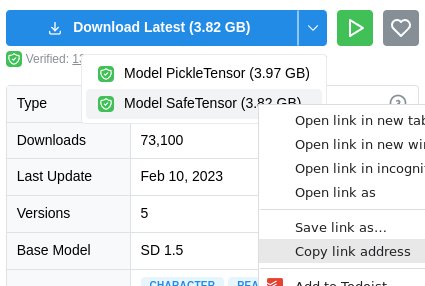
You can use the Pruned SafeTensor, if one is available. Be careful downloading pickle tensors, they may contain unsafe
code. The original, non-pruned models are much larger but are better for training.
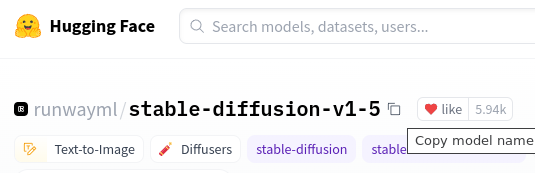
Downloading models from HuggingFace
Use the huggingface:// protocol to download models from the HuggingFace hub.
Most models will detect and download all of the necessary files, while Textual Inversions with "model": "concept"
will only download the trained_embeds.bin file.
When downloading models from HuggingFace, you can use the copy button next to the repository name:
Using a custom VAE
You can use a custom VAE when converting models. Some models require a specific VAE, so if you get weird results,
check the model card for a specific VAE. This works for both diffusers directories and original SD checkpoints. You
can use the sources field in the extras file to download the VAE file or provide a HuggingFace model name.
{
  "diffusion": [
    {
      "name": "diffusion-stablydiffused-aesthetic-v2-6-ema",
      "source": "civitai://6266?type=Pruned%20Model&format=SafeTensor",
      "format": "safetensors",
      "vae": ".cache/vae-ft-mse-840000-ema-pruned.safetensors"
    },
    {
      "name": "stable-diffusion-onnx-v1-4",
      "source": "CompVis/stable-diffusion-v1-4",
      "vae": "stabilityai/sd-vae-ft-ema"
    }
  ],
  "correction": [],
  "upscaling": [],
  "sources": [
    {
      "name": "vae-ft-mse-840000-ema-pruned",
      "source": "https://huggingface.co/stabilityai/sd-vae-ft-mse-original/resolve/main/vae-ft-mse-840000-ema-pruned.safetensors",
      "format": "safetensors"
    }
  ]
}
Some common VAE models include:
- https://huggingface.co/stabilityai/sd-vae-ft-ema
- https://huggingface.co/stabilityai/sd-vae-ft-ema-original
- https://huggingface.co/stabilityai/sd-vae-ft-mse
- https://huggingface.co/stabilityai/sd-vae-ft-mse-original
Optimizing models for lower memory usage
Running Stable Diffusion with ONNX acceleration uses more memory by default than some other methods, but there are a number of server optimizations that you can apply to reduce the memory usage:
diffusers-attention-slicingonnx-fp16onnx-graph-allonnx-low-memorytorch-fp16
You can enable optimizations using the ONNX_WEB_OPTIMIZATIONS environment variable:
# on linux:
> export ONNX_WEB_OPTIMIZATIONS=diffusers-attention-slicing,onnx-fp16,onnx-low-memory

# on windows:
> set ONNX_WEB_OPTIMIZATIONS=diffusers-attention-slicing,onnx-fp16,onnx-low-memory
At least 12GB of VRAM is recommended for running all of the models in the extras file, but onnx-web should work on
most 8GB cards and may work on some 6GB cards. 4GB is not supported yet, but it should be
possible.
Based on somewhat limited testing, the model size memory usage for each optimization level is approximately:
| Optimizations | Disk Size | CUDA Memory Usage | DirectML Memory Usage | ROCm Memory Usage | Supported Platforms |
|---|---|---|---|---|---|
| none | 4.0G | 11.5G | TODO | 8.5G | all |
onnx-fp16 |
2.2G | 9.9G | TODO | 4.5G | all |
| ORT script | 4.0G | 6.6G | - | - | CUDA only |
ORT script with --float16 |
2.1G | 5.8G | - | - | CUDA only |
torch-fp16 |
2.0G | 5.9G | - | - | CUDA only |
All rows shown using a resolution of 512x512 and batch size of 1, measured on consecutive runs after the first load. The exact memory usage will depend on the model(s) you are using, the ONNX runtime version, and the CUDA/ROCm drivers on your system. These are approximate values, measured during testing and rounded up to the nearest 100MB.
Permanently blending additional networks
You can permanently blend and include additional networks in an ONNX model by including the inversions and loras
keys in the diffusion model.
Even when permanently blended, tokens work normally and the LoRA or Textual Inversion weights must be activated using their built-in tokens and the ones provided when blending the model.
This can be used to embed additional networks at your favorites weights and share the resulting models or to pre-blend some common configurations in a server context.
{
  "diffusion": [
    {
      "name": "diffusion-blend-many",
      "source": "runwayml/stable-diffusion-v1-5",
      "inversions": [
        {
          "name": "cubex",
          "source": "sd-concepts-library/cubex",
          "format": "concept",
          "label": "Cubex"
        }
      ],
      "loras": []
    }
  ]
}
Extras file format
- diffusion
- array of diffusion models
- each one has:
- format
- one of:
- bin
- ckpt
- onnx
- pt
- pth
- safetensors
- one of:
- label
- string
- name
- string
- source
- string
- config
- string
- vae
- string
- inversions
- array of inversion networks
- permanently blended with the base model
- each one has:
- name
- source
- format
- label
- token
- weight
- loras
- array of lora networks
- permanently blended with the base model
- each one has:
- name
- source
- label
- weight
- format
- correction
- array of correction models
- each one has:
- format
- same formats as diffusion models
- label
- string
- name
- string
- source
- string
- format
- upscaling
- array of upscaling models
- each one has:
- format
- same formats as diffusion models
- label
- string
- name
- string
- source
- string
- scale
- number
- format
- networks
- array of additional networks
- each one has:
- format
- one of:
- ckpt
- safetensors
- one of:
- model
- one of:
- concept
- embeddings
- cloneofsimo
- sd-scripts
- one of:
- name
- source
- type
- one of:
- inversion
- lora
- one of:
- format
- sources
- array of additional sources to fetch
- each one has:
- format
- name
- source
- array of sources
- strings
- additional translation strings
Environment variables
This section catalogs the environment variables that can be set in the launch script. These variables can be set in the server launch scripts as
# on linux:
> export [ENVIRONMENT VARIABLE NAME]=[VALUE]

# on windows:
> set [ENVIRONMENT VARIABLE NAME]=[VALUE]
The following environment variables are available:
ONNX_WEB_MODEL_PATH- The path to the models folder. Defaults to /models
ONNX_WEB_EXTRA_MODELS- The path to the extra models json file. See the Adding your own models section for more information. Defaults to nothing.
ONNX_WEB_OUTPUT_PATH- The path to the model output folder (for generated images). Defaults to /outputs
ONNX_WEB_PARAMS_PATH- The path to the params.json file that holds the model parameters currently in use. Defaults to /api. Not accessible by default in the Windows bundle; use the web interface or set another path.
ONNX_WEB_CORS_ORIGIN- The allowed origins for cross-origin resource sharing headers. Allows access from other websites or clients.
ONNX_WEB_ANY_PLATFORM- The platform that will be used when selecting any platform in the client.
ONNX_WEB_BLOCK_PLATFORMS- Platforms that should not be shown in the client. Can be used to disable CPU mode and only run on your GPU.
ONNX_WEB_DEFAULT_PLATFORM- The default platform that will be selected in the client, if you have more than one GPU or have CPU mode enabled.
ONNX_WEB_IMAGE_FORMAT- The image format for the output. Defaults to .png.
ONNX_WEB_CACHE_MODELS- The number of models to cache. Decreasing this value may decrease VRAM usage and increase stability when switching models, but may also increase startup time. Defaults to 5.
ONNX_WEB_SHOW_PROGRESS- Whether to show progress in the command prompt window. Defaults to True.
ONNX_WEB_OPTIMIZATIONS- See the Optimizing models for lower memory usage section for more information.
ONNX_WEB_JOB_LIMIT- Job limit before workers will be automatically restarted. Defaults to 10.
ONNX_WEB_MEMORY_LIMIT- VRAM usage limit for CUDA devices. Defaults to none.
Known errors
This section attempts to cover all of the known errors and their solutions.
If you encounter an error that does not show up here, please create a new issue on Github:
- collect as many details as possible
- screenshots from the client and logs from the server are especially helpful
- redact anything you are not comfortable sharing, like IP addresses or prompt text
- please include any stacktraces that appear in the server logs
- run the check environment script
- open a Github issue
Check scripts
There are a few scripts provided to check various parts of the app, environment, or models. These can be used to collect information for debugging problems or just to figure out what is in a tensor file with a confusing name.
Check environment script
The check-env.py script will check for required and recommended packages and collect their versions, then list
the ONNX runtime providers that are available in the current environment.
This can be used to make sure you have the correct packages installed and that your GPU provider appears in the list.
To run the check-env.py script using your onnx-web virtual environment:
# on linux:
> cd onnx-web/api
> onnx_env/bin/activate
> python3 scripts/check-env.py

# on windows:
> cd onnx-web\api
> onnx_env\Scripts\Activate.bat
> python scripts\check-env.py
Check model script
The check-model.py script will check the format and contents of a model file. The models can be ONNX models,
safetensors, pickle tensors, protocol buffers, or binary files.
The script will attempt to load the file, which can import libraries and execute code in the case of pickle tensors. Only run the script on files that you trust enough to load.
To run the check-model.py script on a model using your onnx-web virtual environment:
# on linux:
> cd onnx-web/api
> onnx_env/bin/activate
> python3 scripts/check-model.py /home/ssube/onnx-web/models/inversion/1234.safetensor

# on windows:
> cd onnx-web\api
> onnx_env\Scripts\Activate.bat
> python scripts\check-model.py C:\Users\ssube\onnx-web\models\inversion\1234.safetensor
Client errors
Error fetching server parameters
This can happen when the client cannot fetch the server parameters because the request times out or has been rejected by the server.
This often means that the requested API server is not running.
Parameter version error
This can happen when the version in the server parameters is too old for the current client or missing entirely, which was the case before version v0.5.0.
This often means that the API server is running but out-of-date.
Distorted and noisy images
This can happen when the selected diffusion or upscaling models are not trained for the current resolution or aspect ratio.
This often means that the scale parameter does not match the upscaling model.
Scattered image tiles
This can happen when the selected upscaling model is not trained for the current resolution.
This often means that the scale parameter does not match the upscaling model.
Server errors
If your image fails to render without any other error messages on the client, check the server logs for errors (if you have access).
Very slow with high CPU usage, max fan speed during image generation
This can happen when you attempt to use a platform that is not supported by the current hardware.
This often means that you need to select a different platform or install the correct drivers for your GPU and operating system.
Example error:
loading different pipeline
C:\Users\ssube\stabdiff\onnx-web\api\onnx_env\lib\site-packages\onnxruntime\capi\onnxruntime_inference_collection.py:54: UserWarning: Specified provider 'CUDAExecutionProvider' is not in available provider names.Available providers: 'DmlExecutionProvider, CPUExecutionProvider'
The CPUExecutionProvider is used as a fallback, but has a tendency to max out all of your real CPU cores.
Connection refused or timeouts
This can happen in a few situations:
- when your API server is not running
- when your client is attempting to use the wrong API server
- when your firewall is blocking the API server's port
If you are using a remote server, not on your local machine, check the Settings tab and make sure the API Server is set to the correct DNS name or IP address and port number.
If you have a firewall running (which you should), make sure that the correct port has been opened and the API server is allowed to use that port.
The default ports are:
- TCP/5000 for the API server
If you are running the GUI separately, such as when using nginx or for development:
- TCP/80 for the GUI using nginx without a container
- TCP/8000 for the GUI using the nginx container
- TCP/8000 for the GUI dev server
Error: name 'cmd' is not defined
This can happen when you attempt to create the Python virtual environment on a Debian system, and appears to be a bug
in the Python venv module: https://www.mail-archive.com/debian-bugs-dist@lists.debian.org/msg1884072.html
Installing the venv module through apt appears to resolve the issue:
> sudo apt install python3-venv
CUDA driver version is insufficient for CUDA runtime version
This can happen when your CUDA drivers are too new or too old for the API server and ONNX runtime.
Make sure you are using CUDA 11.x drivers. The 11.6 version is recommended by ONNX, but 11.7 appears to work as well.
Please see the ONNX runtime docs for more details.
Command 'python' not found or Command 'pip' not found
This can happen when your operating system has both Python 2 and 3 installed and uses different commands to differentiate between them.
Using python3 and pip3 instead of python and pip in the commands should resolve this issue:
> pip3 install -r requirements/base.txt # for example, you may be running a different command
AttributeError: module 'numpy' has no attribute 'float'
This can happen when you have numpy 1.24 or a newer version installed. The float attribute has been deprecated and
was removed in 1.24. Some of the dependencies will automatically install the latest version, while others need a 1.23
version.
Reinstalling numpy 1.23 should resolve this issue:
> pip install "numpy>=1.20,<1.24" --force-reinstall
Numpy invalid combination of arguments
This can happen when you attempt to use an ONNX model that was exported using an older version of the ONNX libraries.
This often means that you need to re-export your models to ONNX format using the current version of the server and the libraries it depends on.
ONNXRuntimeError: The parameter is incorrect
This can happen in a few situations:
- when you attempt to use an inpainting model from the txt2img or img2img tabs, or vice versa
- when you attempt to use img2img with a non-square, non-power-of-2 source
This often means that you are using an invalid model for the current tab or an invalid source image for the current model.
Example error:
  File "C:\Users\ssube\stabdiff\onnx-web\api\onnx_web\pipeline.py", line 181, in run_inpaint_pipeline
    image = pipe(
  File "C:\Users\ssube\stabdiff\onnx-web\api\onnx_env\lib\site-packages\torch\autograd\grad_mode.py", line 27, in decorate_context
    return func(*args, **kwargs)
  File "C:\Users\ssube\stabdiff\onnx-web\api\onnx_env\lib\site-packages\diffusers\pipelines\stable_diffusion\pipeline_onnx_stable_diffusion_inpaint.py", line 427, in __call__
    noise_pred = self.unet(
  File "C:\Users\ssube\stabdiff\onnx-web\api\onnx_env\lib\site-packages\diffusers\onnx_utils.py", line 61, in __call__
    return self.model.run(None, inputs)
  File "C:\Users\ssube\stabdiff\onnx-web\api\onnx_env\lib\site-packages\onnxruntime\capi\onnxruntime_inference_collection.py", line 200, in run
    return self._sess.run(output_names, input_feed, run_options)
onnxruntime.capi.onnxruntime_pybind11_state.RuntimeException: [ONNXRuntimeError] : 6 : RUNTIME_EXCEPTION : Non-zero status code returned while running Conv node. Name:'/conv_in/Conv' Status Message: D:\a\_work\1\s\onnx
runtime\core\providers\dml\DmlExecutionProvider\src\MLOperatorAuthorImpl.cpp(1878)\onnxruntime_pybind11_state.pyd!00007FFB8404F72D: (caller: 00007FFB84050AEF) Exception(15) tid(2428) 80070057 The parameter is incorrect
The expanded size of the tensor must match the existing size
This can happen when you use an upscaling model that was trained at one specific scale with a different scale that it was not expecting.
This often means that you are using an invalid scale for the upscaling model you have selected.
Example error:
  File "C:\Users\ssube\stabdiff\onnx-web\api\onnx_web\upscale.py", line 155, in upscale_resrgan
    output, _ = upsampler.enhance(output, outscale=params.outscale)
  File "C:\Users\ssube\stabdiff\onnx-web\api\onnx_env\lib\site-packages\torch\autograd\grad_mode.py", line 27, in decorate_context
    return func(*args, **kwargs)
  File "C:\Users\ssube\stabdiff\onnx-web\api\onnx_env\lib\site-packages\realesrgan\utils.py", line 228, in enhance
    self.tile_process()
  File "C:\Users\ssube\stabdiff\onnx-web\api\onnx_env\lib\site-packages\realesrgan\utils.py", line 182, in tile_process
    self.output[:, :, output_start_y:output_end_y,
RuntimeError: The expanded size of the tensor (2048) must match the existing size (1024) at non-singleton dimension 3.  Target sizes: [1, 3, 2048, 2048].  Tensor sizes: [3, 1024, 1024]
Shape mismatch attempting to re-use buffer
This can happen when you accidentally try to run more than one pipeline on the same device at the same time.
This often means that you need to set ONNX_WEB_BLOCK_PLATFORMS to remove the duplicates. You can try one of the
following values, which will disable the legacy platform names but will not block hardware acceleration through
the CUDA and DirectML platforms:
# for Windows:
> set ONNX_WEB_BLOCK_PLATFORMS=amd,cpu,nvidia

# for Linux:
> export ONNX_WEB_BLOCK_PLATFORMS=amd,cpu,nvidia
Example error:
[2023-02-04 12:32:54,388] DEBUG: onnx_web.device_pool: job txt2img_1495861691_ccc20fe082567fb4a3471a851db509dc25b4b933dde53db913351be0b617cf85_1675535574.png assigned to device amd
[2023-02-04 12:32:54,388] DEBUG: onnx_web.diffusion.load: reusing existing diffusion pipeline

023-02-04 12:32:54.4187694 [W:onnxruntime:, execution_frame.cc:604 onnxruntime::ExecutionFrame::AllocateMLValueTensorPreAllocateBuffer] Shape mismatch attempting to re-use buffer. {2,8,77
,40} != {2,77,8}. Validate usage of dim_value (values should be > 0) and dim_param (all values with the same string should equate to the same size) in shapes in the model.
[2023-02-04 12:32:54,432] INFO: werkzeug: 10.2.2.16 - - [04/Feb/2023 12:32:54] "GET /api/ready?output=txt2img_1495861691_ccc20fe082567fb4a3471a851db509dc25b4b933dde53db913351be0b617cf85_1
675535574.png HTTP/1.1" 200 -
Cannot read properties of undefined (reading 'default')
This can happen when you use a newer client with an older version of the server parameters.
This often means that a parameter is missing from your params.json file. If you have not updated your server
recently, try updating and restarting the server.
If you have customized your params.json file, check to make sure it has all of the parameters listed and that the
names are correct (they are case-sensitive).
Example error:
Error fetching server parameters
Could not fetch parameters from the ONNX web API server at http://10.2.2.34:5000.

Cannot read properties of undefined (reading 'default')
Output Image Sizes
You can use this table to figure out the final size for each image, based on the combination of parameters that you are using:
| Input Width/Height | Highres | Iterations | Scale | Upscaling | Scale | Outscale | Correction | Outscale | Upscale Order | Output Width/Height | Formula |
|---|---|---|---|---|---|---|---|---|---|---|---|
| 512 | no | n/a | n/a | no | n/a | n/a | no | n/a | n/a | 512 | 512 * 1 * 1 * 1 |
| 512 | yes | 1 | 2 | no | n/a | n/a | no | n/a | n/a | 1024 | 512 * 2 * 1 * 1 |
| 512 | yes | 1 | 4 | no | n/a | n/a | no | n/a | n/a | 2048 | 512 * 4 * 1 * 1 |
| 512 | yes | 2 | 2 | no | n/a | n/a | no | n/a | n/a | 2048 | 512 * 2 * 2 * 1 * 1 |
| 512 | yes | 2 | 4 | no | n/a | n/a | no | n/a | n/a | 4096 | 512 * 4 * 4 * 1 * 1 |
| 512 | no | n/a | n/a | yes | 2 | 1 | no | n/a | n/a | 512 | 512 * 1 * 1 * 1 |
| 512 | no | n/a | n/a | yes | 2 | 2 | no | n/a | n/a | 1024 | 512 * 1 * 2 * 1 |
| 512 | no | n/a | n/a | yes | 4 | 1 | no | n/a | n/a | 512 | 512 * 1 * 1 * 1 |
| 512 | no | n/a | n/a | yes | 4 | 2 | no | n/a | n/a | 1024 | 512 * 1 * 2 * 1 |
| 512 | no | n/a | n/a | yes | 4 | 4 | no | n/a | n/a | 2048 | 512 * 1 * 4 * 1 |
| 512 | no | n/a | n/a | no | n/a | n/a | yes | 1 | first | 512 | 512 * 1 * 1 * 1 |
| 512 | no | n/a | n/a | no | n/a | n/a | yes | 2 | first | 1024 | 512 * 1 * 1 * 2 |
| 512 | no | n/a | n/a | no | n/a | n/a | yes | 1 | last | 512 | 512 * 1 * 1 * 1 |
| 512 | no | n/a | n/a | no | n/a | n/a | yes | 2 | last | 1024 | 512 * 1 * 1 * 2 |
| 512 | no | n/a | n/a | no | n/a | n/a | yes | 1 | both | 512 | 512 * 1 * 1 * 1 |
| 512 | no | n/a | n/a | no | n/a | n/a | yes | 2 | both | 2048 | 512 * 1 * 1 * 2 * 2 |
| 512 | yes | 1 | 2 | yes | 2 | 2 | no | n/a | n/a | 2048 | 512 * 2 * 2 * 1 |
| 512 | yes | 1 | 4 | yes | 2 | 2 | no | n/a | n/a | 4096 | 512 * 4 * 2 * 1 |
| 512 | yes | 1 | 2 | yes | 4 | 4 | no | n/a | n/a | 4096 | 512 * 2 * 4 * 1 |
| 512 | yes | 1 | 4 | yes | 4 | 4 | no | n/a | n/a | 8192 | 512 * 4 * 4 * 1 |
| 512 | yes | 1 | 2 | yes | 2 | 2 | yes | 2 | first or last | 4096 | 512 * 2 * 2 * 2 |
| 512 | yes | 1 | 4 | yes | 2 | 2 | yes | 2 | first or last | 8192 | 512 * 4 * 2 * 2 |
| 512 | yes | 1 | 2 | yes | 4 | 4 | yes | 2 | first or last | 8192 | 512 * 2 * 4 * 2 |
| 512 | yes | 1 | 4 | yes | 4 | 4 | yes | 2 | first or last | 16k | 512 * 4 * 4 * 2 |
| 512 | yes | 1 | 2 | yes | 2 | 2 | yes | 2 | both | 8192 | 512 * 2 * 2 * 2 * 2 |
| 512 | yes | 1 | 4 | yes | 2 | 2 | yes | 2 | both | 16k | 512 * 4 * 2 * 2 * 2 |
| 512 | yes | 2 | 2 | yes | 2 | 2 | yes | 2 | both | 16k | 512 * 2 * 2 * 2 * 2 * 2 |
| 512 | yes | 2 | 4 | yes | 2 | 2 | yes | 2 | both | 64k | 512 * 4 * 4 * 2 * 2 * 2 |
| 512 | yes | 3 | 2 | yes | 2 | 2 | yes | 2 | both | 32k | 512 * 2 * 2 * 2 * 2 * 2 * 2 |
| 512 | yes | 3 | 4 | yes | 2 | 2 | yes | 2 | both | 262k | 512 * 4 * 4 * 4 * 2 * 2 * 2 |
| 512 | yes | 1 | 2 | yes | 4 | 4 | yes | 2 | both | 16k | 512 * 2 * 4 * 2 * 2 |
| 512 | yes | 1 | 4 | yes | 4 | 4 | yes | 2 | both | 32k | 512 * 4 * 4 * 2 * 2 |
| 512 | yes | 2 | 2 | yes | 4 | 4 | yes | 2 | both | 32k | 512 * 2 * 4 * 2 * 2 |
| 512 | yes | 2 | 4 | yes | 4 | 4 | yes | 2 | both | 128k | 512 * 4 * 4 * 2 * 2 |
| 512 | yes | 3 | 2 | yes | 4 | 4 | yes | 2 | both | 64k | 512 * 2 * 2 * 2 * 4 * 2 * 2 |
| 512 | yes | 3 | 4 | yes | 4 | 4 | yes | 2 | both | 524k | 512 * 4 * 4 * 4 * 4 * 2 * 2 |