7.6 KiB
ONNX Web UI
This is a rudimentary web UI for ONNX models, providing a way to run GPU-accelerated models on Windows and even AMD with a remote web interface.
This is still fairly early and instructions are a little rough, but it works on my machine. If I keep working on this for more than a week, I would like to add img2img and Nvidia support.
Based on work by:
- https://gist.github.com/harishanand95/75f4515e6187a6aa3261af6ac6f61269
- https://gist.github.com/averad/256c507baa3dcc9464203dc14610d674
- https://github.com/AUTOMATIC1111/stable-diffusion-webui/wiki/Install-and-Run-on-AMD-GPUs
- https://www.travelneil.com/stable-diffusion-updates.html
Features
- REST API server capable of running ONNX models with DirectML acceleration
- multiple schedulers
- web app to generate and view images
- parameter inputs with validation
- txt2img mode
Contents
Setup
This is a very similar process to what harishanand95 and averad's gists recommend, split up into a few steps:
- Install Git and Python, if you have not already
- Create a virtual environment
- Install pip packages
- Install ORT Nightly package
- Download and convert models
Note about setup paths
This project contains both Javascript and Python, for the client and server respectively. Make sure you are in the correct directory when working with each part.
Most of these setup commands should be run in the Python environment and the api/ directory:
> cd api
> pwd
/home/ssube/code/github/ssube/onnx-web/api
The Python virtual environment will be created within the api/ directory.
The Javascript client can be built and run within the gui/ directory.
Install Git and Python
Install Git and Python 3.10 for your environment:
The latest version of git should be fine. Python must be 3.10 or earlier, 3.10 seems to work well.
Create a virtual environment
Make sure you have Python 3.10 or earlier, then create a virtual environment:
> python --version
Python 3.10

> pip install virtualenv

> python -m venv onnx_env
This will contain all of the pip libraries. If you update or reinstall Python, you will need to recreate the virtual environment.
Every time you start using ONNX web, activate the virtual environment:
# on linux:
> ./onnx_env/bin/activate

# on windows:
> .\onnx_env\Scripts\Activate.bat
Update pip itself:
> python -m pip install --upgrade pip
Install pip packages
Install the following packages for AI:
> pip install diffusers transformers ftfy numpy spacy scipy
> pip install onnx onnxruntime torch
> pip install onnxruntime-directml --force-reinstall    # TODO: is this one necessary?
Install the following packages for the web UI:
> pip install flask stringcase
Or install all of these packages at once using the requirements.txt file:
> pip install -r requirements.txt
At the moment, none of these packages seem to need specific versions. There is a warning about an incompatibility in
Protobuf, and some of the gist guides recommend diffusers=0.3.0, but I had trouble with old versions of diffusers
before 0.6.0 or so. If I can determine a good set of working versions, I will pin them in requirements.txt.
Install ORT Nightly package
Download the latest DirectML ORT nightly package for your version of Python and install it with pip.
Downloads can be found at https://aiinfra.visualstudio.com/PublicPackages/_artifacts/feed/ORT-Nightly. If you are using
Python 3.10, download the cp310 package. For Python 3.9, download the cp39 package, and so on.
> wget https://aiinfra.pkgs.visualstudio.com/PublicPackages/_apis/packaging/feeds/7982ae20-ed19-4a35-a362-a96ac99897b7/pypi/packages/ort-nightly-directml/versions/1.14.dev20221214001/ort_nightly_directml-1.14.0.dev20221214001-cp310-cp310-win_amd64.whl/content
> pip install ~/Downloads/ort_nightly_directml-1.14.0.dev20221214001-cp310-cp310-win_amd64.whl --force-reinstall
Make sure to include the --force-reinstall flag, since it requires some older versions of other packages, and will
overwrite the versions you currently have installed.
Download and Convert Models
Sign up for an account at https://huggingface.co and find the models you want to use. Popular options include:
Log into the HuggingFace CLI:
> huggingface-cli.exe login
Issue an API token from https://huggingface.co/settings/tokens, naming it something memorable like onnx-web, and then
paste it into the prompt.
Download the conversion script from the huggingface/diffusers repository to the root of this project:
Run the conversion script with your desired model(s):
> python convert_stable_diffusion_checkpoint_to_onnx.py --model_path="runwayml/stable-diffusion-v1-5" --output_path="./stable-diffusion-onnx-v1-5"
This will take a little while to convert each model. Stable diffusion v1.4 is about 6GB, v1.5 is at least 10GB or so.
You can verify that all of the steps up to this point worked correctly by attempting to run the api/setup-test.py
script, which is a slight variation on the original txt2img script.
Usage
Configuring and running the server
In the api/ directory, run the server with Flask:
> flask --app serve run
Note the IP address this prints.
If you want to access the server from other machines on your local network, pass the --host argument:
> flask --app serve run --host 0.0.0.0
This will listen for requests from your current local network and may be dangerous.
Securing the server
When making the server publicly visible, make sure to use appropriately restrictive firewall rules along with it, and consider using a web application firewall to help prevent malicious requests.
Configuring and hosting the client
From within the gui/ directory, edit the gui/examples/config.json file so that api.root is the URL printed out by
the flask run command from earlier. It should look something like this:
{
  "api": {
    "root": "http://127.0.0.1:5000"
  }
}
Still in the gui/ directory, run the dev server with Node:
> node serve.js
Using the web interface
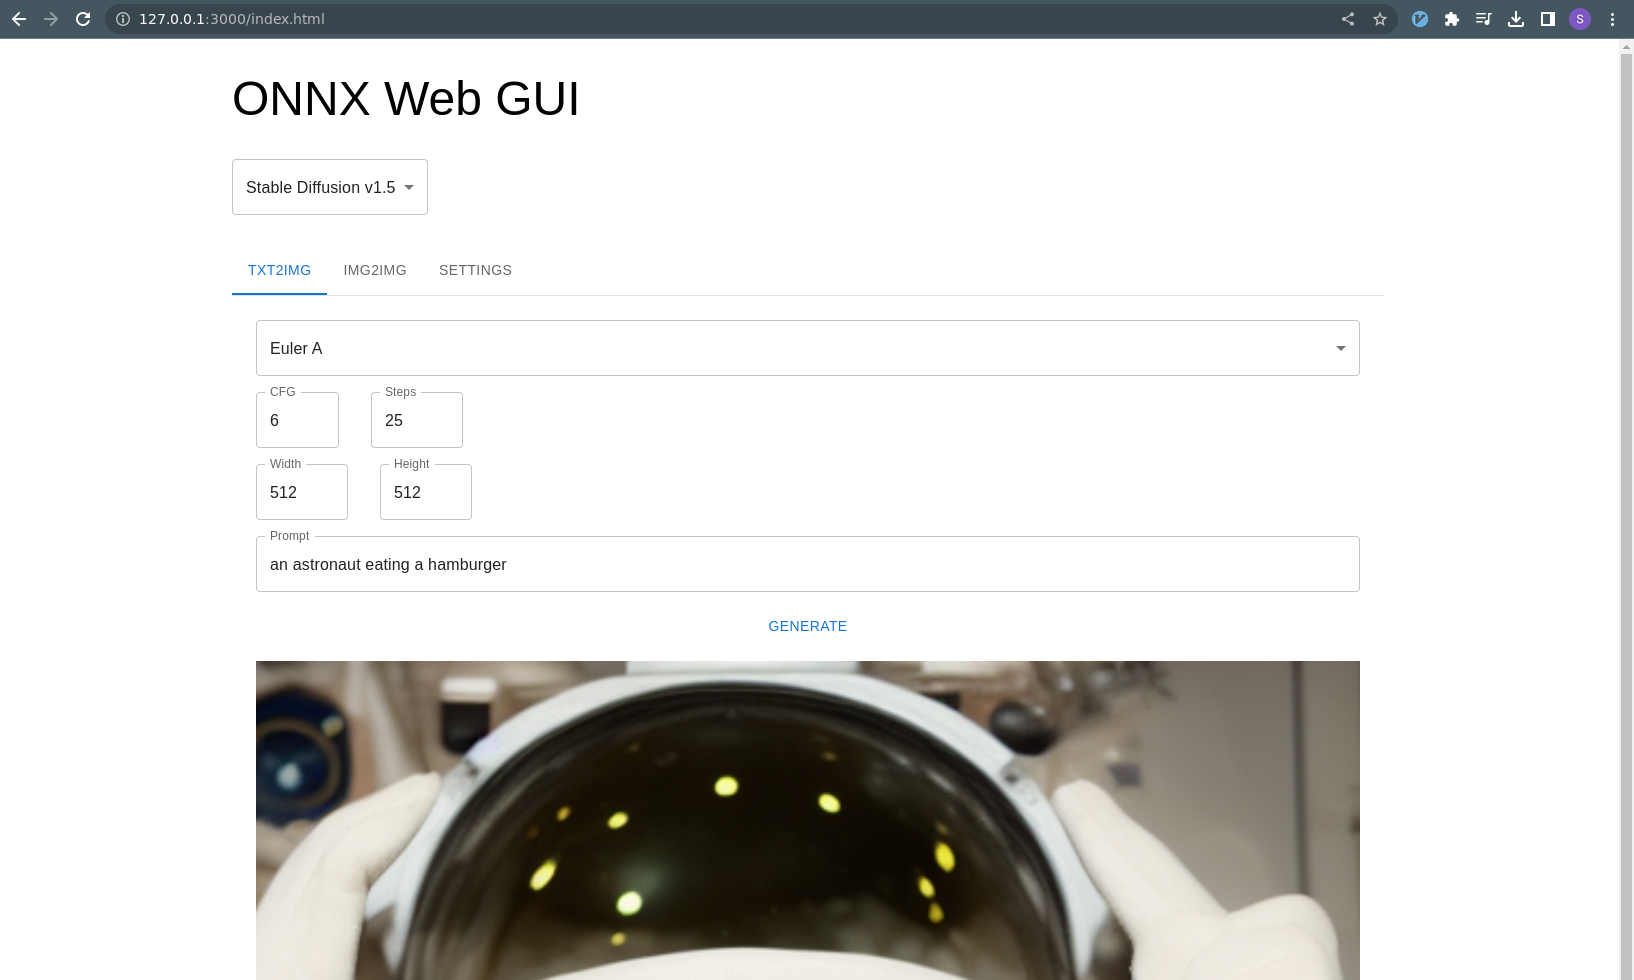
You should be able to access the web interface at http://127.0.0.1:3000/index.html or your local machine's hostname.
The txt2img tab will be active by default, with an example prompt. You can press the Generate button and an image
should appear on the page 10-15 seconds later (depending on your GPU and other hardware).